Survival skills for ensemble playing

When you first start playing in ensembles it can be overwhelming. We all sometimes experience imposter syndrome - the feeling that everyone else in the group is better than you and you really shouldn’t be there. Can I tell you a secret? You’re not alone! In any massed ensemble there will be others who are feeling exactly the same. What are they doing differently? It’s probably just that they’ve developed more survival skills over the years and have learnt how to cope when the music gets tough.

A student on one of my courses asked me about this earlier this year. She felt she needed to learn the art of ‘self rescue’ and that term struck a chord with me. Professional players are expected to be on top of every note we play; able to cope with whatever the music throws at us. But then we’ve spent decades honing our skills to do this. As an amateur musician you no doubt have equivalent skills in whatever you do for a living. For instance, a surgeon knows what to do if a patient unexpectedly goes into cardiac arrest, or a driving instructor can often predict when their student might need an intervention to prevent an accident. If you’re still developing your recorder playing skills there are bound to be moments when you feel overloaded and unable to cope. Don’t give yourself a hard time - instead, realise this is completely normal!

Over the years I’ve met many very intelligent musicians who feel they should be able to do things in music through the power of their intellect - the idea that if I can understand something I should be able to do it! It’s a painful realisation, but sometimes this just isn’t possible. Don’t give yourself a hard time if you fail to achieve perfection. Perfection is something that doesn’t come easily to any human being - even us professionals! Instead, use your intellect to be critical (in a positive way) of your mistakes and try to understand what you can do to improve your playing and make fewer errors further down the line.

My aim today is to share some tips with you which will help when you’re faced with these mental overload moments. Survival techniques which will help you keep afloat and ease your way. These will help you survive a challenging ensemble session unscathed, having learnt from the experience and with a better idea of what you need to practise to find it easier next time.

Before we look at survival skills, lets briefly consider some things you can do before you start playing. These will improve your chances of playing well and getting the most from your rehearsal.

Warm up yourself and your recorder

Doing a few simple stretches to limber up your muscles can be immensely helpful. If your muscles are warm and relaxed you’re much more likely to play well. Think about your overall posture, ensuring you sit well - this’ll help you breathe efficiently and prevent aches and pains caused by slouching. Don’t forget your hands and arms too - recorder playing makes many demands on the delicate structures in your hands, as well as the tendons and muscles in your forearms which control them. An athlete wouldn’t dream off going for a 5k run without warming up first, yet many recorder players think nothing of sitting down for a two hour rehearsal without so much as a single stretch!

The British Association of Performing Arts Medicine have an excellent sheet of warm up exercises which you can print out and keep in your recorder case. There’s a permanent link to these in my Members’ Area for Score Lines subscribers or you can download them from the BAPAM website.

Once you’re warmed up and ready to go, don’t neglect your recorder! Playing in cold churches and village halls often results in fogged up recorders, which sound like you’re playing through cotton wool. This is caused by a build up of condensation in the windway and, ultimately, the swelling of the recorder’s block. The best way to combat this is to get the head joint up to body temperature before you play a single note. Doing this ensures the moisture in your breath is the same temperature as the instrument, so the water doesn’t condense onto the block in droplets.

A simple way is to pop the head joint under your arm for a few minutes - you may have spotted me doing exactly this in some of my consort videos. Smaller instrument head joints can be put into pockets or tucked into your waistband for a similar result. With larger recorders this is less practical so I’ll sometimes use a warm (not hot!) wheat bag (heated gently in the microwave) or a hot water bottle against the head joint. I recently saw this tip shared by the Von Huene recorder workshop in the US which might offer an alternative (albeit somewhat unsightly!) solution.

However you do it, warming up your recorder before playing will avoid the need for perpetual clearing of condensation from the windway and keep your sound clear and beautiful.

Take regular breaks

If you have a long rehearsal to get through be sure to stop at least every hour or so. Get up and walk around to improve your circulation and do some more stretches to loosen the muscles you’ve been working so hard. Chat to a friend about something unrelated to the music, allowing yourself to switch off from the piece you’re studying. You’ll come back refreshed and with improved concentration.

~ ~ ~

Now let’s look at some practical tips to help you keep afloat in ensembles and, where necessary, perform some ‘self rescue’.

Hone your sight reading skills

Being able to read new music swiftly and accurately is an important skill. The ability to efficiently assess and implement musical notation is one that takes time to develop but it’s worth the effort. I wrote a post about this very topic recently so I won’t repeat everything here. If you click here you’ll find masses of tips to help you improve your sight reading and it’ll open in a new tab so you don’t need to lose your place here either!

You don’t need to play every note

It’s easy to get hung up on the need to play every single note. During an initial sight read perfection isn’t the priority. Instead your aim should be to sense of the lie of the land, form a basic understanding of how your part fits into the whole and hopefully spot the bits you need to come back to and practise. Remember too that occasional groups of fast notes (perhaps a couple of semiquavers here and there) are often the least important, musically speaking. They’re probably just the means of travelling between two larger notes but because they’re quick we instinctively feel they must be important. The result is often laboured and slows the music down. Instead, don’t be afraid to slur them together initially if that helps, or even drop a few of them on the floor! I often jokingly say to groups that we can sweep them up later and it’s not a disaster if you don’t play every note on the first reading.

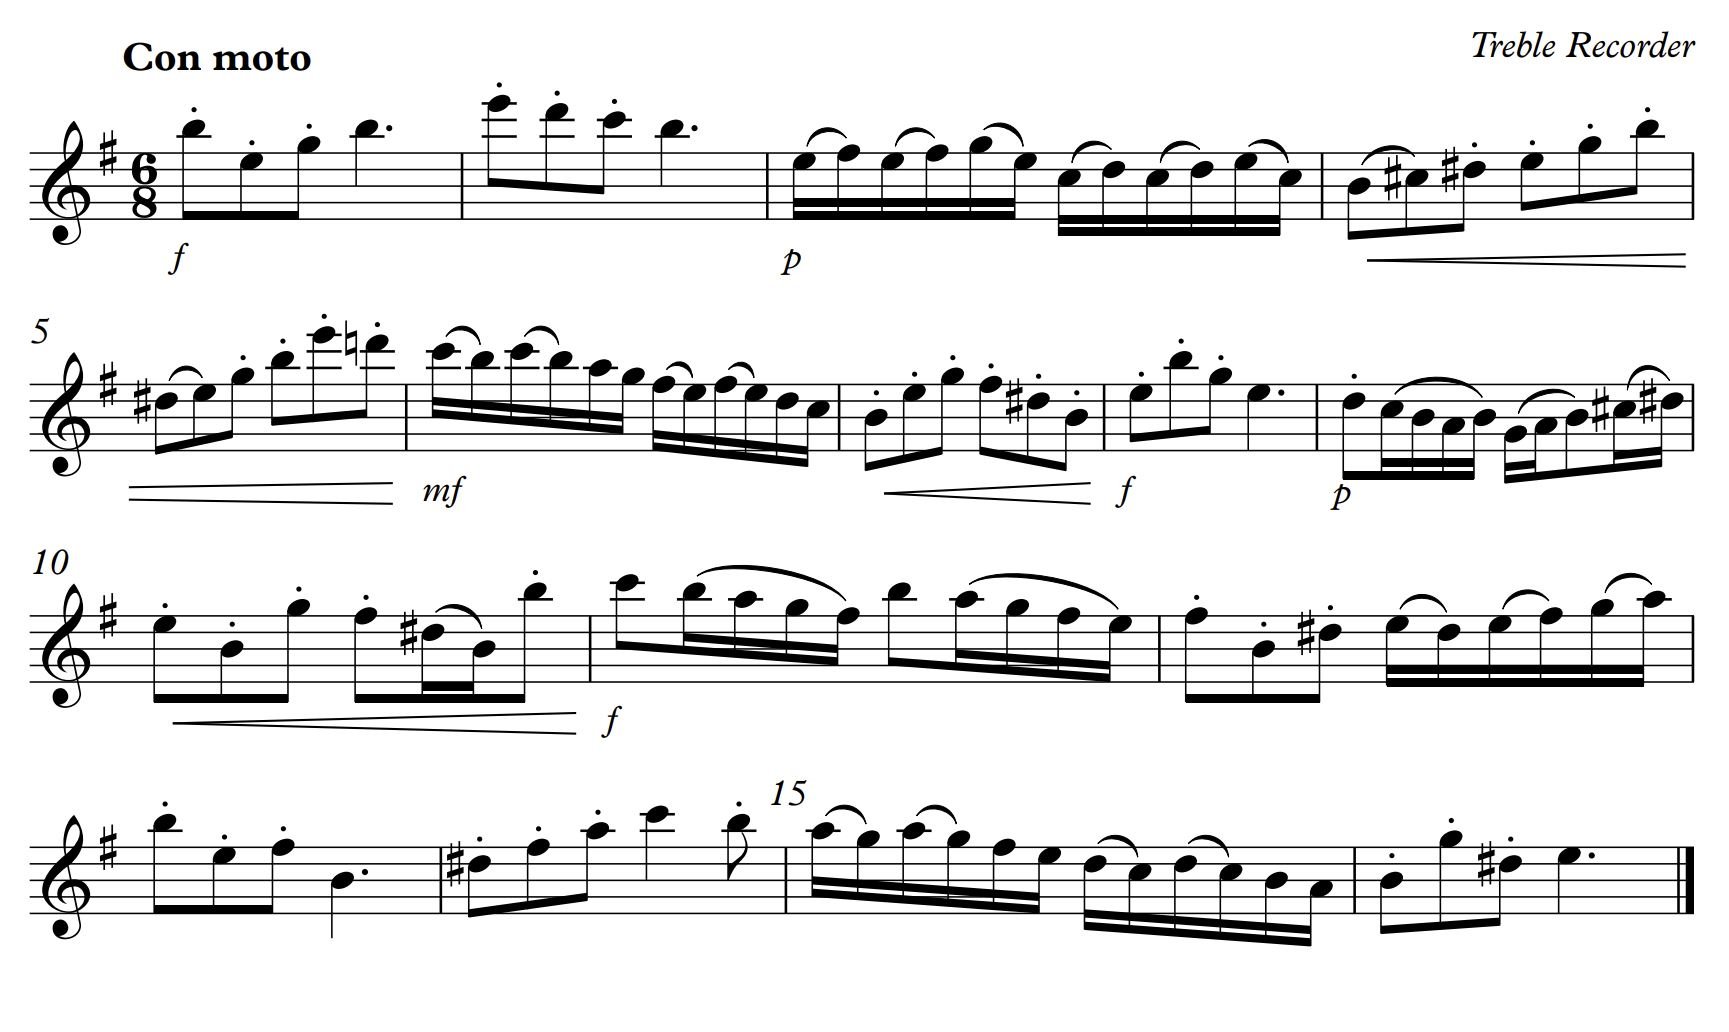
The semiquavers in this piece by Schmelzer are mostly decorative and provide a means from getting one place to another so you can skate over them in sight reading rather than getting bogged down.

Conductors will often do a first read through of a new piece at full speed. This is because we know that taking the music slowly at first will set that slower tempo in the players’ minds and it’ll be all but impossible to speed things up later. Working on things slowly comes after the first read through, after you’ve got the ultimate tempo fixed in your mind. The ultimate tempo may be prove too much of a challenge at first, so try to focus on the main beats rather than every note, aiming to be with at least the first beat of each bar.

Learn to edit on the hoof

When I was studying for A level music we were all allocated another student to accompany. Our task was to attend their instrumental lessons and to play the piano accompaniments for them. I was allocated a baritone singer called Chris who had a penchant for Vaughan Williams. My pianistic skills were rather less developed than my recorder playing so I often felt out of my depth. But playing for Chris’s lessons taught me a vital skill - that of on the spot editing. Faced with a piece in five flats, I knew I couldn’t get to every note initially, so I learnt to leave some of them out! In piano terms this often meant keeping the bassline going at all costs, while thinning down what went on in the right hand (treble) part. By doing this I could provide Chris with some important harmonic support, while keeping the pulse consistent so he could focus on his singing. Over time I gradually added more of the detail back in to give a fuller picture of the music.

In recorder terms this might translate into cutting down some of the whizzy runs. If there’s a long run of semiquavers, perhaps aim initially to play the first of each beat. As you become more familiar with the music you can gradually complete the picture with more notes. The key benefit of developing this skill is the way it allows you to keep up with the pulse at all times - a vital skill for any ensemble player.

Use your conductor, if you have one

As Walter Bergmann was fond of saying, “Your conductor has been paid for. You waste your money if you don’t look at him.” Assuming you have someone standing in front of your group offering a regular beat, you would be wise to make use of them! At the most basic level, a conductor will show you the speed of the music and their beat patterns can be immensely helpful.

If you can ensure the first beat of each bar you play occurs when the conductor’s hand is heading downwards you can be sure you’re in the right place at least once in every bar! If the gestures given by conductors has ever puzzled you do take a look at my blog post, Do you speak the same language as our conductor? Here I explored the gestures we make with our hands, what they mean and much more. A good conductor will convey much more than just the pulse in their gestures so it’s worth learning what some of these mean.

Ensure you can see your conductor

As we get older our eyesight changes and it’s not uncommon to need different strength glasses or contact lenses for music reading. Reading the notes accurately is important, but if you neglect to ensure you can also see your conductor’s beat you’re missing out on some vital information. The most important thing is to be able to at least see the beat in your peripheral vision. It’s surprising how much awareness you can have of your surroundings even while you’re focusing on the music. Your conductor won’t mind if you’re seeing a somewhat fuzzy image of him or her but they will object if you completely ignore them and play out of time! Try adjusting your music stand to different heights until you find a combination that works for you. Many musicians end up buying single vision lenses which are set for the distance of their music stand. This allows you to set your stand at a height where you can easily see both the music and the conductor, even if their movements are a little blurry.

Understand your music

Before you play, glance through the music and look for significant moments, such as key and time signature changes or tempo changes. If you don’t know what the Italian (or maybe French or German) terms mean you could quickly look them up online. Alternatively, look at your conductor and you may well see some clues. I often ask groups what a given term means and there’s almost always a chorus of, “Watch the conductor!” in response. There’s no harm in making a point of learning the meaning of the most common terms and Wikipedia has a great online dictionary of them here.

Read ahead to avoid surprises

One of the most important skills to develop i your sight reading is the ability to read at least a few notes ahead. In slow music you may only need to know where the next couple of notes are leading, but in fast runs it’s helpful to be able to look a few beats ahead. This takes practice, but in time you’ll find it helps remove a lot of the surprises in the music you’re about to play.

Beware of line and page breaks

No matter how good you are at reading ahead, certain danger spots remain - usually points where you move to a new line or page. When you see a line break coming up try to read ahead a little more so you’re ready for what comes next. Such spots are governed by an unwritten law that the trickiest parts of any piece inevitably occur just after a line or page break - just when you’re least expecting them! In old manuscripts you’ll sometimes see a custos (or guard note) written at the end of each line - a warning of the first note you’ll encounter on the next line. There’s no reason why you shouldn’t write such symbols into your own music if that helps you prepare for the line ahead.

The little squiggle at the end of each line in this Sammartini Duo is a custos, indicating the pitch of the first note on the next line.

Navigating your way around bar numbers

The quickest way to restart in the middle off a piece of music is to use bar numbers, or sometimes rehearsal letters. Bar numbers come in different formats - sometimes at the start of each line or perhaps every 5 or 10 bars. It often surprises me how hard musicians find it to navigate around a score so it’s worth having some handy tricks up your sleeve. Just as an air steward warns you the nearest emergency exit can be behind your seat rather than in front of you, sometimes it’s easier too count backwards from a higher bar number rather than on from an earlier one. For instance, bar 88 is closer to 90 than it is to 80.

Rehearsal letters are handy if the music has them, and conductors will often shout them out if they know some of the players have come adrift. These letters (or occasionally numbers) tend to be placed at points in the music where something significant happens - perhaps a double bar line, key change or a moment where the mood or character of the music changes. These can be handy landmarks to check you’re still in the right place.

Learn to count rests efficiently

Apologies if this sounds like teaching grandma to suck eggs, but if this helps one person it’s been worth it! With blocks of rests, count the beats in the bar but with each successive bar replace the number 1 with the number of bars you’ve counted. So, four bars in 3/4 time are counted 123, 223, 323, 423. Counting this way will help you easily keep track of how many bars have passed.

Do you get flummoxed by large blocks of rest? When you pass ten or twenty bars it can be easy to miscount. Don’t be afraid to use your fingers as an aid! Lots of professional musicians do exactly this so you’ll be in good company. You can do so in a subtle way, with your fingers on your lap or your recorder. You can even use a two hand approach, counting each successive ten on one hand and the intervening bars on the other hand.

Finding your spot amid blocks of rests

Blocks of rests can also be problematic if your restarting point occurs in the middle of one, especially when the conductor is keen to get going again. A useful trick is to identify the bar number of when your part resumes (say, bar 72). Once you know this simply count on from the bar number where you’re restarting (say, bar 68) until you get to the point where you need to play again. Using the examples I’ve give you’d count bars 68, 69, 70 and 71 then play in 72. Much simpler and quicker than figuring out how many bars are left to count, especially if you’re faced with a long block of rests.

Don’t play in ‘bingo mode’

This is the term I use for musicians who bury their heads in the music (eyes down, as you would at bingo!) and ignore everything that’s going on around them. When you first start playing in ensembles listening to the other players can be a distraction. Conductors will often implore musicians to listen more carefully but there may well be a small voice in your head saying, “In your dreams, matey!” If this sounds familiar, try instead to listen in a general way rather than focusing on the detail. Especially when playing older music, which is in a style we’re familiar with as listeners, having an overall awareness of the sound can tell you whether you’re in the right place. Violent clashes or completely contradictory rhythms in a piece of Baroque music may well be a sign that you‘ve come adrift from the rest of the ensemble. Yes, it could be that you’re right and everyone else is wrong, but in all likelihood you’re the one who’s out place!

“If all the others are wrong and you alone are right, follow the wrong.”

Walter Bergmann

Don’t always trust your hearing…

Having implored you to listen, there will be times when your hearing won’t be entirely trustworthy. The acoustic qualities of a building can be misleading, especially if it’s a boomy church. By the time a note reaches you from the other side of the room it’s bounced off several walls and the ceiling and this takes time. A half second delay can be catastrophic for coordination, so in this situation be careful to play with your conductor’s beat rather than simply trusting your ears. If everyone does the same, the combined sound reaching your audience will be in time. The same applies if you play multichoir music, where you’ll often be geographically spread around the room.

Take the best seat in the house if you can

When you have the opportunity to play with large groups of players (perhaps a massed playing session at a course or festival) don’t underestimate the effect of where you sit. So often I’ll see the musicians with the least confidence or the poorest hearing sitting right at the back, usually struggling to keep up and hear what’s going on. Instead, grab yourself a seat in the front couple of rows. You’ll find it much easier to hear and see the conductor, keep in touch with the music and you’ll have the support (musical and technical) of those around you. Conductors very rarely bite so you needn’t fear us and, even better, you’ll hear the full tonal range of sound from those behind you!

Listen to the conductor’s advice

My job as a conductor isn’t just to keep everyone in time - I’m responsible for shaping the music too. Along the way conductors will often sneak in snippets of technical advice too - tips about fingerings or perhaps the best articulation to use. Don’t underestimate the power of these tips - listen carefully and you might pick up something that’ll benefit your playing beyond the current rehearsal.

Don’t chat

If your rehearsal is also a chance to see friends try to save your chitchat for the breaks. At the very moment you’re nattering with each other mid-rehearsal you might miss out in a crucial piece of information from the conductor! Likewise, don’t tootle in the rests or when the conductor is talking - it’s very distracting for others.

Always carry a pencil and don’t be afraid to use it!

A pencil can be a very powerful tool for a musician. Jotting in accidentals or highlighting repeats ensures you get those details right next time and frees you up to concentrate on other things. Don’t be precious about writing on music (always in pencil, never pen) - professionals do it all the time and needing to annotate reminders doesn’t make you less of a musician. Remember too to write in your music in such a way that you’ll understand what it means later. It’s no good writing something cryptic in the music which you can’t translate next week - it’s always better to call a spade a spade!

Add some cues to your music

In orchestral music parts often include cue notes - small notes which show what’s going in in other parts of the score. These can be immensely helpful. For instance, during a long block of rests, you’ll hear another line playing a melody at the moment it’s marked in your score, confirming you’re in the right place. Sadly such markings are rarely used in recorder music, but there’s no reason why you can’t add your own. You could take a look at the score and pencil in a snippet of the melody from another part, but even having the words ‘tenor melody’ or ‘dotted rhythm in basses’ jotted in can be reassuring.

Don’t get hung up on trills

Trills often reduce recorder players to quivering wrecks. But in an ensemble situation don’t get too hung up on them, at least at first. If you have the spare mental capacity to put some of them in that’s great, but the main notes are more important, especially when sight reading. When you’re comfortable with the music perhaps start adding the simpler trills, which don’t require complex alternative fingerings. As you gain control of them you can gradually add in the others. If trills make you tremble why not take a look at my recent blog about these decorative delights?

Take the music home to practise if you can

If you know you’re going to be working on a piece over several sessions don’t be afraid to ask to borrow your part between rehearsals. Practising ensemble or orchestra parts can feel unrewarding, especially when faced with a passage of long notes or off beats. However, spending five minutes each day practising that tricky semiquaver run will undoubtedly give you more confidence at the next session.

Don’t worry about nerves and don’t look back!

Playing with a new ensemble or orchestra can be nerve wracking and there’s no shame in having a few butterflies. A little nervous energy will make you concentrate harder and you’ll soon find your feet.

Inevitably you’ll make mistakes (we all do) but when you’re in the middle of a run-through don’t look back at errors and berate yourself for them. Doing so will almost certainly distract you from what’s coming next and cause you to make more mistakes. Instead, try to remember where you went wrong so you can come back and fix it later. I’ll often mark trouble spots with a pencil mark in the margin to remind me to practise those bars at home.

Fake it until you make it

You often hear this phrase used to encourage people to blag their way through a situation, with the idea that if you have enough conviction everyone else will believe you. While this is frequently an oversimplification of what’s required to be successful, there is an element of truth in the saying.

I often hear recorder players being tentative in ensembles, assuming that if they try and hide no one will notice their mistakes. I can understand the logic, but in reality that strategy doesn’t often work! Tentative recorder playing tends to result in weak tone quality, poor intonation because you’re under blowing, and the rhythm often becomes mushy too.

A better approach is to ignore that scared voice in the back if your head and instead play with conviction and positivity. As a result you’re more likely to produce a good tone, be better in tune with others, and play more rhythmically. This positive experience will probably boost your confidence and help you to keep doing the same again. Yes, you’ll still make mistakes, but no one will die as a result and you can easily fix those later!

Don’t forget to breathe

Breathing in is a good thing to do, whether in music or everyday life. It’s easy to get caught up in the moment while wrestling with a difficult passage, only to run out of breath. There’s always somewhere to breathe (even in Bach!) and if the place isn’t obvious just take a breath anyway - the extra oxygen will help you think clearly as well as improving your tone quality.

Don’t be afraid to ask for help

If you lose your place while playing don’t be afraid to make eye contact with your conductor to seek help. If I see someone doggedly look down at their music, wiggling their fingers while I’m conducting I have to assume they’re ok. On the other hand, if a player looks up at me pleadingly I’ll do my best to get them back in, perhaps at their next entry after some rests or by shouting out a rehearsal letter. If I don’t know you’re lost I can’t help you!

Remember, you’re doing this for fun!

Ultimately an amateur musician (by definition) plays for the love of music. Whether you play every note perfectly, or with lots of errors, you should aim to enjoy yourself. Your life doesn’t depend on your playing so don’t let mistakes distract you from the enjoyment your hobby brings.

~ ~ ~

Improving between rehearsals

I’ll finish off with a few quick ideas to help you get more from your ensemble playing.

Pick your level carefully

If you have a choice of different standard ensembles (perhaps at a festival or on a course) don’t be afraid to experiment. Sometimes selecting a session which is well within the boundaries of your technique will help boost your confidence. Equally, a level which stretches you just beyond your comfort zone can be a useful way to improve your survival skills.

Don’t forget that courses and festivals can be a great opportunity to find your feet with a new size of recorder too. For instance if you’ve just started learning the bass recorder you could give it a first outing in a large massed playing session (where there’s safety in numbers) or in an easier session which won’t stretch you beyond your abilities.

Take some recorder lessons

If playing in an ensemble highlights particular weaknesses in your playing don’t be afraid to seek out some lessons. A few sessions with an experienced teacher can be useful to help you understand what you need to work on to improve.

Practise regularly and strategically

It’s not necessary to practise for hours every day, but a few minutes spent on a few technical exercises can pay dividends for your ensemble playing. Maybe some long notes to work on your breathing and tone, and a handful of scales and arpeggios to build your finger technique - all of these will help you cope better in an ensemble situation.

Use ‘virtual’ ensembles to improve your ability to keep up

My playalong consort videos (and there are plenty of others out there too) allow you the opportunity to play ensemble music and they offer the same pressure to keep up as a real ensemble. Even better, you can rewind and repeat them as often as you like without the feeling you’re holding others up!

~ ~ ~

The most important thing you can do to become a better ensemble musician is simply to get out there and play with others. If you wait until you feel you’re ‘good enough’ there’s a danger you’ll perpetually live in fear. Remember, in every ensemble there will be others who are equally worried about getting it wrong. We learn from our mistakes so go ahead and play, safe in the knowledge that every ensemble experience is going to help you develop as a musician.

Do you have ‘self rescue’ strategies I haven’t mentioned?

If there are things you do in rehearsals to help you keep going which I haven’t covered I’d love to hear about them. Strategies which seem obvious to one person may not be instinctive to others and I’d love it if we can all learn from each other. Please do leave a comment below with your favourite musical survival techniques.

Many shades of Browning

What comes to mind if I mention the words ‘the leaves be green’ to you? Do you think of nature? Or maybe a melody pops into your head?

Perhaps the most famous piece of music with this name is by William Byrd - a work which can bring joy or strike terror into the heart of musicians. Byrd’s set of 20 variations on this simple 4 phrase melody is chock full of creative ideas, along with a myriad of syncopated cross rhythms. But did you know that many other composers have written their own interpretation of this concept? Today’s blog explores a selection of these - not a comprehensive catalogue, but more a romp through some of my favourites!

What is ‘The Leaves Be Green’?

During the Renaissance the tune, Browning, was a popular melody. Based on a poem with the following words, it celebrates the coming of autumn and has inspired many composers to write their own take on it.

The leaves be green,

The nuts be brown,

They hang so high

They will not come down.


This is the popular melody associated with these lyrics:

Some composers chose to name their pieces Browning, while others plumped for The Leaves Be Green in recognition of the poem’s words.

Why so many versions?

It wasn’t unusual during the Renaissance for composers to write pieces based on popular tunes of the day. For instance, Jacob Van Eyck wrote a collection of 150 solo recorder pieces, Der Fluyten Lusthof, most of which are sets of variations on folk songs, dance tunes, psalms and popular songs.

Of course, this concept wasn’t confined to the Renaissance - think of it like pop bands today recording cover versions of familiar songs - it’s their way to benefit from a song’s popularity while making their own mark. During my research I’ve found countless more reinterpretations of The Leaves Be Green from beyond the Renaissance and you’ll meet some of them here. No doubt some will already be familiar to you, but I hope others will open up new musical vistas.

William Byrd - The Leaves Be Green

SAATB recorders, available in many different editions.

To my mind this is the granddaddy of the genre and offers endless challenges to anyone who tackles it. The Browning theme appears no fewer than twenty times, working through a variety of keys along the way. Modern editions generally have a 6/4 time signature but don’t let that fool you into expecting a predictable, regular rhythm! Byrd plays endlessly with the meter, bringing in rhythms which feel more like 3/2 and even 12/8, plus a stretch with bubbling strings of triplets for good measure. Through the endless cross rhythms the Browning theme acts as musical glue, holding the voices together while they talk across each other and you’ll notice a new interaction or detail each time you play or listen to this.

To complement the theme of this week’s blog post I’ve recorded my own playalong consort video of Byrd’s The Leaves Be Green. I can’t claim to achieve the same levels of perfection as the Flanders Recorder Quartet, but it gives you the opportunity to have a go yourself. Of course it also means you can restart or rewind as many times as you wish as you get to grips with the complex rhythms! I’ve also created my own edition of the piece, which irons out one or two of the notational wrinkles which can make some other editions tricky to read.

Heather Wastie - Browning for Four

SATB recorders, published by Hawthorns Music RA125. To order a copy contact Hawthorns Music here.

Alongside the various Renaissance versions of The Leaves be Green I’ve discovered a number of contemporary reinterpretations, including this one by Heather’s Wastie. Heather’s website describes her as a singer, songwriter, poet, actor, humourist, entertainer and much more besides. She composed this particular piece during one of her courses at Pendrell Hall in Wolverhampton, although it remained unfinished for some time after that. The impetus to complete the work ultimately came from the 40th wedding anniversary of Ken and Kath Smith, two of her course members. Although it’s a 20th century interpretation of the theme, there are still some echoes of the Medieval and Renaissance period, and you can clearly hear Kath and Ken dancing with their guests later in the piece.

If you’ve not played any contemporary Brownings before and fancy dipping you toe in the water this is a really good place to start. it lies easily beneath the fingers and has some beautiful melodic lines.

Henry Stoning - Browning My Dear

SAATB recorders - music and playalong video available via the button:

Henry Stoning is one of those composers who has today been all but forgotten. However, John Hawkins, the 18th century writer on music, described him as well known in his day and he was active during the reign of Queen Elizabeth I and King James I. We don’t even know his dates of birth or death - the resources I’ve found simply describe him as having flourished around 1600!

Like the Wastie version of Browning, this is a great place to start exploring. Stoning’s version is concise and pretty straightforward to play, while allowing everyone a slice of the action too. I shared my playalong consort version of this as a subscriber video in 2021 but I’ve discovered a couple of delightful commercial recordings too.

John Baldwin - A Browninge of Three Voices

AAB recorders - score and parts available to download from Serpent Publications.

Baldwin’s working life was spent as a singer, first as a tenor lay clerk at St George's Chapel, Windsor (from 1575) and later as a Gentleman of the Chapel Royal, where he became a paid member of staff from 1598. Today he is perhaps best known as the copyist of My Ladye Nevells Booke, a collection of 42 keyboard pieces by William Byrd. As a composer he wrote both vocal and instrumental music, including this Browning for three voices.

Baldwin’s version of Browning is a gem - full of rhythmic interest, with some pretty exotic key changes for music of this period. The only edition I’ve discovered of the music is unbarred and the treble parts need to be played an octave higher than written. Neither of these are insurmountable problems, but I am mulling over the idea of creating a modern edition at playing pitch and with barlines - watch this space! in the meantime, you can enjoy these two recordings!

Klaus Miehling - Browning Suite Op.148

AATB recorders, published by Edition Walhall, FEM132.

This is another contemporary take on the Browning theme discovered while I was researching this blog post. A German harpsichordist, composer and musicologist born in 1963, Miehling was a fresh name to me. He’s certainly a prolific composer (with over 1200 works to his name) and his output includes music for a vast array of instrumental and choral groups. This Browning Suite is one of a number of works which include the recorder and definitely harks back to an earlier time.

Described as a motet for recorder quartet, it is reminiscent of a Baroque orchestral suite, with a French overture followed by five dance movements and a finale. Bach would have recognised this format well, with the dances including a Courante, Sarabande and Bourrée. The musical style will be be familiar to anyone who enjoy Baroque music, albeit with the occasional modern harmonic twist!

A short extract from Klaus Miehling’s Browning Suite

Elway Bevin - Browning

ATB recorders - music and playalong video can be found via the button:

Elway Bevin’s version of Browning is one of my all time favourites. He makes amazing use of minimal resources, creating wonderful melodic and rhythmic interactions between the parts. The excitement gradually builds, climaxing in a flurry of quavers towards the end of the piece. Perhaps the most cunning section though begins at bar 57 where the Browning theme appears in the tenor part in a clear 3/2 rhythm. Either side, the treble and bass lines bounce along in 6/4 rhythms, but instead of working in tandem, Bevin places the treble and bass rhythm patterns a beat adrift from each other!

I recorded this version as one of my playalong consort videos last summer and it was such fun to try and capture the feeling of competition between the musical lines.

Steve Marshall - The Leaves be Blue

SATTBB recorders, published by May Hill Edition, MHE 20706

Most composers stick to the original lilting meter for their take on Browning, but there’s no rule to say this has to be the way. Steve Marshall’s musical background is in jazz, so it’s no surprise he should follow this route when he used the Browning theme. I’ve long been a fan of The Leaves be Blue, although recorder players aren’t always completely at ease with its Latin rhythms. I asked Steve what inspired him to write this piece and this is what he told me:

“In, I believe, 2005 the much-missed Andrew Melville took a well-known Pavan by John Dowland and transformed it - believe it or not - into a Tango. I played in the first performance of that Lachrimae Tango and, the very next day, I played in a performance of The Leaves be Green by Elway Bevin. The urge to transform that marvellous piece in some unlikely way was irresistible, and so I changed it into a rumba-inspired piece in 4/4. This was not a lucrative commission, but one of many rather quirky pieces I have written over the years, in order to exercise my compositional chops or (more likely) as a bit of fun!”

To my surprise, there don’t seem to be any recordings of The Leaves be Blue, so I figured I’d make my own!

William Inglott - The Leaves Bee Greene

Five voices, score available to download here. A recorder arrangement by Paul Clark is also available, Clark Collection CC128.

The first Elizabethan age was a golden era for music and there are so many composers from that period who are almost unknown today. William Inglott is one such name, although history suggests he wasn’t so obscure in his lifetime. He worked at both Hereford and Norwich Cathedrals as organist, replacing Thomas Morley at the latter. One of the pillars at Norwich Cathedral is decorated with the following memorial for Inglott, restored at the expense of William Croft (Master of the King’s Music) in the 18th century.

Here Willyam Inglott Organist doth rest,
Whose arte in musique this cathedrall blest,
For descant most, for voluntary all
He past: on organ, songe and virginall:
He left this life at age of sixtie seaven;
And now 'mongst angells all sings saint in heaven;
His fame flies farr, his name shal never die;
See art and age here crowne his memory

Today only a handful of Inglott’s pieces remain, including this and one other from the Fitzwilliam Virginal Book. This was a collection of nearly 300 keyboard pieces, including works by William Byrd, Giles Farnaby and Thomas Morley - you may be interested to see the original keyboard version of the Leaves Bee Greene here.

Once again, I’ve found a couple of different recordings for you to enjoy - one played on the organ (with added percussion!) and the second on harpsichord.

Clement Woodcock - Browning My Dear

Five voices, SATTB - Score and parts available to download. Also published by London Pro Musica, EML112

To complete my selection of Brownings from the Renaissance, we have another relatively unknown composer - Clement Woodcock. Like Inglott, Woodcock spent much of his life as a church musician, working as a lay clerk at Both King’s College, Cambridge and Canterbury Cathedral. He also spent a good deal of time in my home town, Chichester, working as Cathedral organist and master of the Choristers. I taught the recorder at Chichester’s Cathedral school for nearly two decades, so it’s rather pleasing too think that we both spent countless hours working and making music in the same Cathedral, albeit four centuries apart!

Woodcock’s version of Browning is short and sweet and fits beautifully on recorders, although you’ll need to read the second part up an octave to play it on the treble recorder.

Sue Handscombe - The Leaves be Turning, the Nuts be Brown

SATB recorders, published by Peacock Press, P544

To bring us full circle, my final version of Browning came as a result of an experience of playing Byrd’s The Leaves Be Green. Sue told me the impetus to write this came from an experience preparing the Byrd for a golden wedding celebration. Things didn’t go to plan in rehearsals, with Byrd’s complex rhythms often tripping the musicians up. Instead Sue decided to write her own jazzy interpretation of the Browning theme and this is the result. As for the golden wedding celebrations - all was well in the end and the group made it through the performance without getting tangled up!

Sue’s the Leaves be Turning, The Nuts be Brown, has its own rhythmic intricacies, altogether different from Byrd’s, but I can guarantee you’ll have great fun playing it!

Which Browning is your favourite?

There we have ten different interpretations of this iconic melody, and there are more I could have included besides. Which is your favourite? Or maybe you have a penchant for one composed by someone else? Do share your thoughts in the comments below - it’ll be fascinating to see if you come up with versions I haven’t yet come across!

Learning to become a musical butterfly

The human brain is a marvellous creation - capable of amazing feats of mental gymnastics. Yet there are moments when somehow our brains spontaneously go off piste, taking us on a completely unintended path. Why is this, and what can we do about it?

In particular I’m thinking today about the challenges of playing different sizes of recorder. As recorder players we’re required to become the musical butterflies, flitting from one size of instrument to the next, with a mix of different fingerings and clefs. I’m willing to bet, like me, you’ve had moments where it all goes wrong and you randomly switch into the wrong fingering, for no apparent reason. Am I right? This is a problem recorder players often fret about, but in my experience, it’s completely normal.

I’ve been teaching for over 30 years and in that time I’ve only encountered one pupil who never experienced this. That child, around the age of 9, began exploring treble fingering after playing the descant for a year or two and, as far as I can recall, never suffered any confusion between the two sets of fingerings. Rest assured, she’s a complete outlier - an exception to the norm. You’d think, as a professional recorder player, I’d be immune to such confusion, wouldn’t you? Oh no, I’ve even been known to occasionally slip into both the wrong fingering and the wrong clef at the same time - double the catastrophe!

Why does this happen? The fundamental problem is the fact that the recorder family commonly uses two distinct sets of fingerings - C and F. This means when you’re playing the descant or tenor, the bottom note (all fingerholes covered) is C, while on the treble and bass the same fingering will elicit an F. We take this for granted, but there could, arguably, have been a better way.

Take the brass family for instance. Every brass instrument with piston valves (trumpet, cornet, euphonium, tuba etc) uses one set of fingerings. If you have lips with sufficient flexibility you could switch from trumpet to tuba in a matter of moments, using precisely the same fingerings. In a brass band everyone even plays in the same clef - including the huge B flat basses. One could argue there was a moment, during the first years of the recorder’s revival in the early 20th century, when such a system could have been implemented for our instrument. I’m certainly not the only person to have considered this idea. Evidently some publishers toyed with the idea of taking this route as I have an old Peters edition of a Telemann Sonata which provides recorder parts in both C and F fingering. One can only assume this experiment wasn’t popular and they reverted to the familiar notation we have today.

Sadly this concept didn’t take off, so instead we give our brains extra exercise by learning multiple sets of fingerings. No doubt this flexibility is wonderful in terms of staving off dementia in later life, but it does create the potential for confusion!

Which fingerings should you start with?

For most of my readers this is somewhat academic as you probably already play both C and F instruments. But if you’re new to the recorder, which should you learn first? For children the answer is usually the descant, purely because the instrument’s size better suits small fingers. For adults though, there’s a strong argument for beginning with the treble. The lower tone is more pleasurable when you’re taking your first steps, and ultimately there’s a far wider range of repertoire for solo treble than descant.

Another good reason for beginning with the treble comes when you take your first steps into ensemble playing. More often than not the descant will play the top line, meaning every mistake feels horribly exposed. Playing the treble puts you in the middle of the ensemble - a much more forgiving spot when you’re finding your feet. Any errors will be better hidden and you can build your confidence more easily.

I can play one set of fingerings, why would I want to learn more?

If you’re at the stage where you’re still playing just one set of fingerings, the thought of learning a second set can be daunting. But it’s definitely worth the effort. Playing more than one size of recorder opens up a wider range of music to you and you’ll be welcomed more enthusiastically into ensembles. Yes, you can play descant and tenor without learning different fingerings, but if you’re to count yourself as a truly rounded recorder player you’d be wise to expand your horizons further.

How to get started with a new set of fingerings

If you want to move from C (descant/tenor) fingerings to F (treble) there are books out there which can help. Brian Bonsor’s tutor book, Enjoy the Recorder, comes in varieties for C or F fingerings, but there’s also a ‘From Descant to Treble’ edition. This begins by helping you over that initial bump, as you realise each familiar note now requires a different fingering. Yes, the book was written with children in mind, but it’s packed with lovely tunes and takes a tone which isn’t childish, so it’s just as good for adults to make this step.

If you wish to make the shift from F fingerings (treble) to C (descant/tenor) you’re not quite so well served with books. However, there’s no reason why you can’t learn the new fingerings on your own. The important thing to remember is you’re not actually learning new fingerings. The patterns you use on all sizes of recorder are fundamentally the same. If you play a scale on one recorder then play the same fingerings on a different size of instrument you’ll it’ll sound just as good - just at a different pitch.

So how to get started?

It’s a good idea to learn at least a handful of scale and arpeggios on the recorder you’re already familiar with. Nothing too complicated, but it’ll help if you can associate the combinations of finger patterns with the dots on the page. For instance, here’s a scale of F major for treble recorder. Below it I’ve added a descant/tenor recorder scale which uses the same fingerings - C major.

Play the one on the instrument you’re familiar with, then play its counterpart on the unfamiliar size of recorder. Let your fingers find their way, using the combinations of finger patterns you already know. That was simple enough, wasn’t it?

Play it again, this time consciously associating the notes on the page with the fingerings you’re using. This is easy because you’re used to running up and down scales in the music you already play. For most stepwise note movements you’ll lift a finger to go up and add a finger to go downwards - all very logical. A greater challenge comes when you need to play music which jumps around as you have to move more fingers.

Choose some anchor notes

Once you progress past simple stepwise movements it’s helpful to have what I call anchor notes. By this I mean a small selection of notes which you have firmly fixed in your mind and can locate quickly. For instance, the bottom note of your chosen recorder (all fingers covered) would be a sensible choice, as you’ll never need to play any lower than this. Then pick a handful of other notes, scattered through the recorder’s range. These would be my suggested anchor notes for treble and descant recorders:

With a confident knowledge of the fingerings required for these notes, you can then work between them. They give you fixed points on the recorder, between which you can navigate. I guess it’s the musical equivalent of sailors navigating with the help of the stars before the invention of a clock designed to help them track longitude. Faced with an unfamiliar melody line, you can use these to figure out where you start and as familiar landmarks along the way.

For instance, take this section from the melody, Daphne:

The first note is one step above one of our anchor notes, so we immediately know to cover one less finger hole. We then have some stepwise movement, where you can use the scale patterns you already know. The jump to high D takes us one step above another anchor note and then into another scale. These fixed points allow us to navigate our way through the melody accurately, and as you learn what the tune sounds like you’re able to judge whether you’re playing the right notes.

Start with simple material

Using this method you won’t be a particularly quick sight reader initially, so it’s really important to select simple material at first. If you jump straight in with a fast, complex piece you’re much more likely to be disheartened and give up.

Don’t look back!

It might be tempting to keep relating your ‘new’ fingerings back to the ones you’re familiar with. For instance thinking something along the lines of, “This is a G on my descant, so it’ll be a C on my treble”. Effectively you’re transposing everything on the spot. Yes, it might work for slow, simple material, but in the longer term it’ll slow you down because you’re forcing your brain through more processes to find each note. I had a pupil who did exactly this on the treble recorder when he first came to me for lessons. Somehow he’d reached grade 8 standard, but his treble sight reading was abysmal and painfully slow. Over time we worked to help him associate the dots on the page directly with the treble fingerings and his sight reading improved enormously. Yes, the process will be slower at first, but you’ll make quicker progress in the longer term.

Random forays into the wrong fingering

As I mentioned earlier, one of the most frustrating aspects of playing two sets of fingerings is that moment when it all goes wrong. It’s not unusual to randomly play a wrong fingering (for instance a descant fingering on treble or vice versa) for a note or two and then switch back again - sometimes without even realising it’s happened!

This may feel like a random act, but there are common trigger notes, so it’s rarely as random as you think. If you’re aware of these danger spots you’ll be better able to realise when it happens and, ultimately, to try and avoid these errors. These are the most common triggers I see:

  • Leaps in the music - As we’ve already seen, playing music which moves by step is pretty straightforward because we’re using familiar scale patterns. Leaps are more challenging when you first switch instruments and, as a result, these are the spots where random acts of fingering often happen. Try to be sensitive to this possibility when playing your least familiar size of recorder.

  • Notes which look like they belong to another instrument - This often applies to high notes. On the treble recorder it’s not uncommon for the music to fly up to two, three or even four leger lines above the stave. If you’re a confident treble player you know this, so when faced with a top C or D on the descant or tenor your brain can unconsciously slip into treble fingering. Equally, low treble notes might subconsciously take you back to the earliest notes you played on the descant or tenor and cause you to play the wrong fingering.

How to spot when you’ve gone off piste

The best way to spot errors in fingering is to listen. For instance, when playing in an ensemble with several players on each part, ask yourself if your notes match those of your neighbour. As Walter Bergmann was fond of saying, “If all the others are wrong and you alone are right, follow the wrong.” This will most often happen when sight reading, or towards the end of a rehearsal when you’re tired and are losing concentration.

Switching to other sizes of recorder

Once you’re fluent in both C and F fingerings you open up a whole world of other possibilities. For instance, the bass recorder uses the same F fingerings as the treble, albeit in bass clef. Playing the bass allows you the chance to be part of the musical foundations in an ensemble and can be very rewarding.

If you’ve ever played another bass clef instrument, adjusting to using your familiar fingerings in bass clef may not cause too many challenges. However, if the clef is totally new to you, I can recommend Mrs McGillivray’s Welcome - a book specifically designed to help you make this switch. It has some useful advice about first steps and is packed full of tunes which progressively expand your range on the bass. Using the same strategy I suggested for the descant/treble switch will work just as well for other bass clef instruments - including the great bass in C.

Venturing further off the beaten track

If you choose to explore more hard core forms of recorder playing, you may be faced with treble recorders in G, voice flutes in D or even more exotic creatures. All of these use the same set of fingerings as your humble descant or treble, but they revolve around a different pitch. For instance the bottom note (all holes covered) of a treble in G is, yes, you’ve guessed it, a G! The voice flute is a tenor recorder sized instrument, but the bottom note is a D instead of C.

For such instruments you could learn to read them as you did with the descant and treble. In practice though, many players (myself included) choose to use tricks to deal with these instruments, especially as they’re used less frequently. For instance, when I play the voice flute (from music in treble clef) I instead pretend the clef is actually a bass clef - as if I’m playing a small bass recorder - and the add three flats to the key signature in my mind. That gets me onto the right fingerings without too much in the way of mental gymnastics and only the accidentals require any adjustment.

There are of course occasions where this doesn’t work. I recently had cause to read a trio sonata with friends which was notated in French Violin Clef. That’s a treble clef which winds around the bottom line of the stave instead of the second line. Effectively, it’s very similar to the bass clef as the bottom line of the stave is G. My usual voice flute trick wouldn’t work because the music was effectively already in bass clef. I could have transposed the music, one note at a time, but my ultimate solution was to imagine I was reading from the alto clef and pretend I was playing a descant recorder! That made my head hurt a little, but it helped us get an idea of the piece was worth exploring further. Once I’d learnt he piece fluently it was no longer an issue.

If you choose to explore viol music you too may encounter C clefs - most likely alto or tenor clef. With these clefs, the centre point of the clef indicates the location of middle C. Often there are tricks you can use to tackle these clefs, much as I do with the voice flute. For instance, tenor clef music can be played on the tenor recorder by reading the dots as if they’re really descant recorder notes!

These examples will be outliers for many recorder players. It may be that you never venture beyond the standard sizes and clefs, and that’s absolutely fine. If you should choose to explore other recorders and clefs just be ready to think laterally to make reading easier.

Practising the switch

Let’s assume you’ve taken that first leap and begun to learn a different set of fingerings or a new clef - how do you practise these new skills?

The most important thing is to do it regularly! As with all new skills, if you don’t nurture them frequently you’ll lose them. This might take the form of practice at home, but don’t overlook ensemble opportunities. If you are a member of a Society of Recorder Players branch (or perhaps a chapter of the American Recorder Society if you live across the pond) take all your recorders with you and switch instruments between pieces of music. Playing with others will help you spot any errors and there’s the comfort of playing with others, many of whom will have been through exactly the same process too.

Switch up the order of your instruments. Don’t get into the habit of always practising your different recorders in the same order when you play at home. Sometimes, change things up - perhaps begin with the treble one day and then select the descant first the following day. This promotes mental flexibility and will develop your ability to play any recorder at will.

Do you have tips and tricks for switching instruments?

If you’ve been playing different sizes of recorder for a while, do you have techniques you find helpful? Maybe you’ve found a surefire way to avoid inadvertent switches, or perhaps you have a great way of reading alto clef? I’d love it if you would share your ideas in the comments below. You may have a method I haven’t considered and it’d be great if we could share our ideas.

Sounding Pipes, Edition 2

Easy access to streamed music is one of those things we take for granted these days. But it wasn’t so long ago that if you wanted to listen to a particular piece of music you had to go out and buy the CD, or at least borrow it from your local library. One of the things I love about our access to music now is the way it can take you down all sorts of rabbit holes, bringing fresh discoveries.

It seemed about time I created another of my Sounding Pipes playlists, so over recent weeks I’ve been rummaging on YouTube and elsewhere for gems to share with you. My choices are all linked to the recorder in some shape or form, even if the music isn’t entirely played on our favourite instrument.

G.F.Handel - O ruddier than the cherry from Acis and Galatea

William Christie and Les Arts Florissants

The Love of Acis and Galatea by Alexandre Charles Guillemot

Handel described Acis and Galatea as a “little opera” in a letter to a friend during its composition, but it’s since been called a serenata, masque and oratorio by others. However you wish to classify it, Acis and Galatea is one of Handel’s most enduringly popular works. Written in 1718 while working for the 1st Duke of Chandos in Cannons, north London, this was Handel’s first dramatic work in the English language. It features three major characters - the shepherd Acis, Galatea (a nymph) and Polyphemus, a monstrous giant, who features in this aria. Having just sung about his jealous love of Galatea (“I rage, I melt, I burn”) he then bursts into song with “O ruddier than the cherry”, accompanied by strings and a sopranino recorder!

I was lucky enough to play recorder in a performance of this while studying for my A level exams and I’ve had a soft spot for the work since then. Handel’s juxtaposition of the tiniest of recorders alongside the bass voice surely couldn’t fail to make anyone smile!

Gordon Jacob - Suite for recorder and strings

Annabel Knight and the Maggini quartet - Gordon Jacob Chamber Music with Recorder

The search for a modern recorder concerto which can hold its own against other instruments came to the fore some years ago when Charlotte Barbour-Condini and Sophie Westbrooke both made it to the concerto final of the BBC Young Musician competition in quick succession. Finding a work for recorder which contrasts favourably with large scale Romantic concertos is a challenge, especially as our instrument naturally suits a more intimate setting. Sophie chose to perform Gordon Jacob’s Suite for recorder and strings, albeit augmented with wind instruments (an arrangement made by an old school friend of mine, David Knotts as it happens).

This is a work I love very much and had the honour of performing in Chichester Cathedral many years ago. Here I’ve chosen Annabel Knight’s performance which goes back to its roots, accompanied by the more modest forces of a string quartet. I’ve always had a soft spot for this beautiful Lament, which combines a doleful melodic line and some exquisite string harmonies. Gordon Jacob (1895-1984) wrote several works including the recorder, but was adept at creating beautifully crafted music for any instrument. His catalogue includes concertos for no fewer than sixteen different instruments! Reading about him, I was fascinated to learn he studied with Ralph Vaughan Williams, Charles Villiers Stanford and Herbert Howells while at the Royal College of Music - a real who’s who of composers. Later in life he returned to the RCM as a teacher himself and Malcolm Arnold was one of his students - another composer who later wrote works for the recorder.

Samuel Scheidt - Canzon on O Nachbar Roland

Seldom Sene - Concerto Barocco

The Canzon (or canzona) was the forerunner to the sonata. Ultimately the sonata matured into a multi-movement work, but during the Renaissance the canzona instead featured shorter sections whose tempo and metre varied, while fundamentally remaining a single movement work. Sometimes, as in this case, they were based upon well known melodies or chord progressions.

I first encountered O Nachbar Roland at the Recorder Summer School when I was a teenager. Five of us worked on it in our spare time, with a plan to perform it in the students’ concert at the end of the week. During rehearsals we worked diligently on the transitions between the sections, but also made a plan for what we might do if anyone came unravelled due to nerves. Ultimately our cunning plan was vital as no fewer than three of us came adrift in one section. Unperturbed, we regrouped at the next tempo change and continued as if nothing untoward had happened!

I’m pleased to say Seldom Sene’s performance of O Nachbar Roland is altogether more polished than ours. I love its exploratory nature at the start - each part coming in tentatively until there’s sufficient group momentum for a definitive tempo to be set. While reading up about this piece I discovered a connection I’d never considered before. O Nachbar Roland was a popular tune in the Renaissance and many composers wrote pieces based upon it. However, I hadn’t previously realised its connection with Lord Peregrine Bertie Willoughby, a noted member of the 16th century aristocracy. His name may not be immediately familiar to you, but you may well know of him through William Byrd’s Lord Willoughby’s Welcome Home. The melody is a near doppelgänger of O Nachbar Roland, and was composed in Willoughby’s honour when he returned to a hero’s welcome in London after his victory in the Siege of Bergen in 1588.

Gioacchino Rossini - Overture: The Italian Girl in Algiers

Berlin Recorder Orchestra, conducted by Simon Borutski

When I encountered my first recorder orchestra in 1991 the sound tended to be a rather top heavy affair. The larger bass recorders were still relatively unusual in the UK and it was difficult to achieve a really pleasing balance of sound. How things have changed in 30 years! Today it’s not unusual to have half a dozen contrabasses in such ensembles and the number of even larger recorders is gradually growing too.

In recent months YouTube has offered me a steady stream of recordings by the Berlin Recorder Orchestra and I just had to share this one with you. They seem to have hit a sweet spot in terms of balance with a small forest of big basses in the back row, and relatively few of the high instruments. The result is a wonderfully mellifluous tone, complemented by some fantastic precision playing.

The Romantic period isn’t an obvious one to raid for recorder orchestra music, but this fabulous overture by Rossini is just a joy to listen to. I’ve played in and conducted it myself with different groups (albeit in a different arrangement) and it’s so exciting to be a be part of the excitement and drive which is intrinsic to Rossini’s compositional style. After you’ve watched this video, do have a rummage through the BRO’s YouTube channel because you’re guaranteed to find some more recorder orchestra gems there.


J.S. Bach Violin Concerto in A minor, BWV 1041

Andrew Manze and the Academy of Ancient Music - Bach Solo and Double Violin Concertos

The recorder connection with this piece may be a little tenuous, but this particular album is one of my absolute favourites and is too good not to share. The first movement of this concerto appears as the centrespread of the June issue of The Recorder Magazine, in an arrangement by James Howard Young. Bach is always a challenge to play, as his music rarely takes into account the need for wind players to breathe. That small wrinkle aside, James’ transcription fits the recorder remarkably well and I have a copy of it on my music stand right now - an excellent workout for both brain and fingers. If you’d like to try the Bach for yourself but don’t have a copy of the June Recorder Magazine you can download the music by clicking on the button below.

This recording is 25 years old now, but I adore its energy and Manze’s effortless musicianship. These days he’s more likely to be found conducting orchestras, in repertoire which stretches well beyond the Baroque, but I recommend you listen to the whole album and explore his other recordings too.

Charlie Parker - Ornithology

Lucie Horsch and Fuse - Origins

My last playlist finished with a little frippery, so it seemed appropriate to do the same this time. This track comes from Lucie Horsch’s newest album, Origins, which will be released next month. A number of behind the scenes videos are already available on YouTube though and it’s wonderful to see her delving into this classic jazz number by Charlie Parker. While many of us enjoy jazz, it’s often played badly by recorder players. This always strikes me as a curiosity because so much of the Renaissance and Baroque music we play demands a similar spontaneity in its performance. I love Lucie’s relaxed demeanour here and it’s great to see the interaction between her and the ensemble Fuse.

Hopefully there’ll be something for everyone there. If you’ve discovered a wonderful new recording recently why not share it in the comments below for us all to enjoy - there’s a world of new and exciting music out so let’s explore it together!

Taking the stress out of sight reading

Do you relish first encounters with new music? Or does the thought of sight reading fill you with dread? Assimilating unseen music is an important skill for any musician, whether you’re taking your first steps or you’re an experienced player. The ability to play through fresh repertoire allows us to assess whether we wish to study it further, and in ensembles that fluency of reading is crucial if we’re to be a useful team player.

Think for a moment about what’s required of us when we’re sight reading. You’re reading a written language (much like reading text) and this tells us which notes to play and in what rhythm. Alongside this you have information about whether to play smoothly or detached, how loud or soft, tempo, character and more besides. When you consider the level of multitasking this requires it’s a miracle any of us can get from one end of a new piece to the other without falling over immediately! If sight reading is something you find difficult, don’t give yourself too hard a time - just remember how much you’re trying to do simultaneously.

Having made sight reading sound like an unscalable mountain, my aim today is to help you turn that mountain into a much smaller peak, or maybe a group of smaller hills. Sight reading may come more naturally for some people, but it’s a skill you can definitely improve with practice - just like any other aspect of musicianship.

Let’s take a look at what needs to happen when you’re given a piece to sight read…

One step at a time

It’s easy to panic when faced with a new piece of music but the best strategy is to break the task down into smaller chunks. Let’s consider the most important things to do before you play a single note….

Look at the key signature

Don’t just think to yourself, ‘There are two sharps”, but actually work out which ones they are - F sharp and C sharp. Finger these notes on your recorder so you immediately begin to build some muscle memory.

Check the time signature

How many beats are there in each bar and what sort of beats are they? The top number of the time signature tells you the number of beats, and the bottom number tells you the type. So 3/4 means three crotchet beats in each bar. If you’ve come to music in adulthood and missed out on learning the basics of music theory it’s worth seeking out some tuition to fill the gaps in your knowledge as this’ll help with sight reading too. A local music shop, if you have one near you, is a great place to ask about nearby teachers, and there are many online resources to help you learn about music theory. If this is something you’d like me to cover here, on the Score Lines blog do get in touch or leave a comment below.

Look for accidentals

Glance through the music and look for accidentals. Are there any ‘exotic’ ones which need translating - for instance a G flat is really only an F sharp in disguise. Recognising them in advance will help you play them with greater ease. While you’re at it, look for sharps and flats which repeat later in the bar - you could even pencil them in to remind you!

Check the tempo marking

What speed does the composer want you to play? You may not be able to play it at full speed immediately, but at least try to have any idea what might have been in his or her mind. Wikipedia has a great glossary of musical terms which is worth bookmarking for future reference.

Consider the tempo you’re going to play

You may have to play more slowly than the indicated speed at first, but you do need to have thought about it before you begin! Look through the rhythms to see how wide a range of note values you have. If the music begins with the fastest notes that’s handy, because you get an immediate feel for how whizzy the music will be. If the piece begins with slower notes you’ll need to think through the mathematical relationship between the note values so you understand their relative speeds. Pick a speed where you’ll be able to at least have a stab at the fastest notes, and don’t be afraid to subdivide the longer notes into smaller beats in your head if you need to.

Now look closer at the rhythms

Having taken a wide view of the piece, look a little closer. Look for any funky rhythms which don’t immediately look straightforward. Relate the rhythms to the beats and see if that helps you figure them out. Maybe tap or scat sing the rhythm to yourself initially so you’re not trying to cope with complex rhythms and the fingerings at once. You can also pencil beat numbers into the music if that helps you understand the rhythm more easily.

Check out the rest of the score

Finally, look through at the other markings in the music - articulation (slurs, staccato, accents), dynamics, ornamentation. You may not be able to put all of these in on the first reading, but knowing they’re there is a start. The most important thing is to get the rhythm and pitch first time out - if you can add further refinements that’s a bonus.


A practical example

Let’s put this into practice now and look at a real world example. This short piece comes from a book of practice sight reading pieces. It’s a grade 6 piece, but the processes we’ve just considered can be applied at any level. If you would prefer to try this piece for yourself on descant or tenor recorder you can find a transposed version here.

Click on the music to download printable version

So what jumps off the page at me when I first look at this music?

We have an F sharp in the key signature (E minor, but the name of the key is less important than knowing which sharps to play), with six quaver beats in each bar. The tempo marking, Con moto, means ‘with movement’ so I would probably try to feel two dotted crotchet beats per bar to achieve a sense of flow. If that makes the semiquavers too quick, there’s no reason why you couldn’t feel a quaver beat though.

Glancing through the bars, there are a few accidentals. Checking if any of them repeat during the bar, I see the D sharp needs to be played twice in bar 12. Looking at other details, there are slurs and staccato to be played. The articulation patterns are pretty consistent, with staccato on all of the quavers and most of the semiquavers slurred in twos. Finally, there are some dynamic markings. These tend to be further down my list of priorities as I feel it’s more important to get the notes, rhythms and articulation on a first read through. It all depends on how easily you can cope with everything else so don’t be afraid to prioritise the notes and rhythms if that means you can keep going without hesitating or stopping.

Coping strategies and survival skills

Like everything in life, sight reading is easier if you have some simple strategies in place to help you. If you work through the steps I’ve suggested above that’ll put you on the right path, but here are some handy tips to help you through…

Don’t stop!

I clearly recall my first experience of playing clarinet in the school wind band. We were playing Little Brown Jug by Glenn Miller and I’d only been learning about a year, so I was pretty unsure what to expect. My line was pretty easy, but still I made mistakes and I remember being confused when the band didn’t wait for me as I fumbled my way through! Sight reading an unaccompanied piece is a very forgiving experience - you can stop and start as often as you want. But, the moment when good sight reading skills really come in handy is in an ensemble setting, where the others simply don’t wait for you. Therefore it’s good practice to make yourself keep going at all costs, no matter what you’re sight reading. Drop notes on the floor, but keep the pulse going in your head - you can come back later for a post mortem on what went wrong.

Be methodical and get into a routine

Build good habits. Always working though a mental checklist of the details you need to check before sight reading a piece. If you do this methodically you’ll get into a routine and sight reading will become easier.

Look ahead

When we read words, we gain a sense of the meaning by reading ahead a little, taking in more than one word at a time. This allows us to understand whole sentences, rather than just single words. Music is just the same. Your progress when reading one note at a time will be very slow. Instead, try to look for groups of notes. For instance a dotted crotchet will often be paired with a quaver - think of this like a two syllable word. Beyond that, try to look further on so you see what’s ahead of you and can make sense of whole musical sentences. The faster the music moves, the further you’ll need to look ahead, but don’t forget these wise words from Winston Churchill!

“It is always wise to look ahead, but difficult to look further than you can see.”

Use the notation to help you

Music notation is designed to be helpful. Return to the music example above and look at the beaming. Beams are the horizontal lines which join together groups of shorter notes - quavers for instance. In most music, notes are beamed together in one beat groups. In this example the quavers and semiquavers are always connected together in dotted crotchet length chunks. This helps us see how the notes fit within the framework of the main beats in each bar. This helps you swiftly understand where the beats fall within the bar.

Be prepared for the notes you’ll inevitably forget

When faced with a key signature of multiple flats or sharps, there’ll always be one note you’re bound to forget - usually the last flat or sharp of the key signature. It must be something about the way our brains are wired, but almost every musician I know does this. If you’ve got three sharps, it’ll be the G sharp you’re likely to forget first, while in a key of four flats, you’re likely to overlook the D flats. If you know this you’re in a better position not to fall into the trap!

Focus on rhythm

Rhythm is what keeps music moving along so this should be your first point of focus when sight reading. Yes, aim to play the right notes too, but rhythm is key if you’re to get through the piece.

Don’t worry about perfection

A while ago I wrote a post about the tranny of perfection - the pressure we put on ourselves to be perfect musicians - a task we will always fail at. You can find it here, if you’d like to refresh your memory or read it for the first time. Sight reading will often cause us to fall into the same trap. It’s all too easy to feel you have to get everything perfect first time, but this a desire we’ll rarely fulfil. Instead, keep going, accept you’re going to make mistakes, but remember where they were so you can come back later to correct the errors.

Don’t be afraid to drop notes on the floor

I often jokingly tell ensembles they can drop notes on the floor and we’ll sweep them up later. Sometimes you just have to learn to edit the music on the spot in order to keep it flowing. I learnt this while studying for A level music. I was allocated a singer, whose lessons I was to accompany on the piano. Faced with a Vaughan Williams song with a key of five flats I knew I couldn’t play every note, so I focused on playing the bassline, along with some of the treble notes so my singer had enough accompaniment to carry him along. Second time round, I filled in some of the gaps, once I knew where the music was going.

Use your conductor

If you’re sight reading in an ensemble with a conductor, use them to help you get back on track. You probably won’t have time to eyeball them continuously. But if you’re able to keep their beat in your peripheral vision, you can then check that the first beat of your bars coincides with their downbeats.

Plan ahead and annotate your music

If you’re in an ensemble and you’re given your music while others are still being handed out, use that extra time wisely. Use the steps I listed earlier to prepare and don’t be afraid to pencil helpful notes in your music. Maybe glance through for accidentals and write in ones which reoccur so you don’t forget them first time.

Don’t panic!

Try to keep a clear head, concentrate solely on the task in hand and remember that nothing disastrous will happen if you do make a mistake.

Don’t forget to breathe!

While you’re focusing on getting round the notes, don’t forget to inhale from time to time. You need air to produce a good tone and the oxygen will help your brain to work better too.

You’ve got the basics, now to improve your skills…

Regardless of whether you’re a natural at sight reading, there are lots of things you can do to improve. Here are some practical things that’ll help you hone your skills.

Sight read often

Doing anything regularly will help you improve - conversely, if you only sight read occasionally it’s easy to forget the skills needed. Rummage through your own books of music for pieces you’ve never tried and set yourself the challenge of reading a few unfamiliar lines of music every day. There are graded sight reading books you can buy too and I’ve got some useful resources to share with you too. If you’re just starting out, something simple like a hymn book or a volume of easy folk songs will be useful. Think of this as musical speed dating. You have a short period with each piece of music, where you try to learn as much as possible about it, before moving on to your next date!

Be realistic about the music you choose

Don’t be tempted to select sight reading repertoire which is way beyond your capabilities. If you plan to work on a piece for several weeks or months it doesn’t matter if some of it is initially beyond you. Over time you’ll overcome the technical challenges and learn to play it. To hone your sight reading skills it’s better to choose something a little simpler so you have a sporting chance of maintaining a sense of flow. Over time you’ll be able to move on to more difficult music and stretch yourself further. This is where graded sight reading pieces can be useful, as you’ll be able to see the gradual progression in difficulty.

Practise scales and arpeggios

All music is made up from the patterns we find in scales and arpeggios. By learning to play these fluently, it helps us to recognise them when we see them in music. For grade exams you must memorise them, but I would argue that learning them from music is just as helpful for the purposes of sight reading. In the same way, there are certain combinations of letters which appear frequently in words - once we know this it becomes easier to understand and say words which use them - think of the ‘ough’ in rough, enough, thought and other words. Score Lines subscribers are welcome to download my scale and arpeggio sheets from the Members’ Area on my website. If you’re not a subscriber, why not sign up here for access to lots of exclusive subscriber goodies?

Explore different styles of music

Make yourself sight read music from different genres to widen your experience and learn to cope with unfamiliar patterns. One group I often conduct are great at sight reading early music, but really struggle with jazz based rhythms, purely because they’re less familiar with the style. The more you stretch yourself, the more adaptable you’ll become. Modern music often incorporates more complex rhythms than repertoire from the Renaissance or Baroque, stretching your rhythmic muscles more effectively.

Sight read with others

Playing on your own is enjoyable, but working with others makes you more accountable. Meet up with a friend to play duets, or find an ensemble you can join, where you’ll have to learn to keep going, come what may, when sight reading. If you don’t live near other recorder players, you can always play along with any of my Consort Videos to ensure you keep going!

Sight read on different recorders

If you play several sizes of recorder, make yourself sight read on all of them, perhaps picking a different instrument each day. Otherwise, if you always practise sight reading on the treble, there’s a danger you’ll be a demon reader on that recorder, but may struggle when faced with new music in descant fingering! If you struggle to find sight reading material for some sizes of recorder you’re very welcome to raid the my downloads page for more material.

Use your second chances wisely

When you play a piece for the second time, use that as an opportunity to get more detail and expression into your performance. Maybe pop in more of the dynamics or trills second time round. Be careful not to fall into the trap of overconfidence. On a second reading, subconsciously your brain is saying, “I know this piece a bit now - it’ll be easier this time”, so it’s easy to lose concentration. Conversely, many of the details you stored in short term memory the first time round will have left you because short term memories are stored for only a minute or so in our brains. The result is often a performance which is worse the second time! Don’t get overconfident, but instead concentrate even more to produce a better version second time round.

Looking for practice material?

As I mentioned earlier, there are plenty of sight reading books available to buy, many of them published by the various grade exam boards. There are some great resources available online too. These are the ones I’ve discovered while researching this post but if you know if others please do share them in the comments below.

Practice Sight Reading

A handy website where you can hone your rhythm reading skills at different levels. It’s free to use, but there is an monthly subscription option if you want more bells and whistles.

8 Notes

This site offers sight reading music for a plethora of instruments, including recorder. You can also browse for different styles of music, or even select pieces in particular keys if you want to polish up reading in sharps or flats. Some pieces have accompaniment, to keep you on the straight and narrow, while others are unaccompanied.

Sight Reading Factory

This is an automated site where you can customise the settings, specifying different parameters to help you practise. For instance, you could choose a piece for bass recorder, with a key of two sharps and incorporating triplets.

International Music Score Library Project

IMSLP is a wonderful resource, full of copyright-free music for every instrument you can think of. I often use it to identify fresh consort pieces or repertoire I could arrange for recorders. There’s no reason why you couldn’t use it for sight reading repertoire too though. Searching for ‘1 recorder’ brings up no fewer than 154 pages of suggestions - enough to keep you occupied for several lifetimes!

I hope my thoughts offer you some help with your sight reading. It’s a skill worth practising and polishing as the ability to read fresh music quickly and accurately is so important. If you’ve got your own tips and tricks which you’d like to share please do leave a comment below.