Strictly come dancing - Renaissance style

Do you dance? I have to confess I’m not a dancer myself, but that doesn’t stop me enjoying Strictly Come Dancing when it reappears on the television each autumn. Of course, I still encounter lots of dance music through my playing and I’m sure you do too, regardless of whether you have two left feet.

Knowing a little about the dance music we play is important as it helps us understand the character and style of each one. Initially I intended to cover both Renaissance and Baroque dances in this edition of the Score Lines blog, but it quickly became clear it was in danger of becoming overwhelmingly long! Instead I’m going to concentrate today on Renaissance dances and return to the Baroque period in a subsequent post. As you’ll see then, some of the dances simply evolved, but the Baroque also features some distinct dance forms of its own.

Where to begin?

When it comes to Renaissance dances an excellent starting point is Orchesographie. This is a treatise written by the French cleric Jehan Tabourot under the pseudonym Thoinot Arbeau - an anagram of his real name. Published in 1589, it describes the dances through a conversation between Arbeau and his student, named Capriol.

If that name seems familiar, you’ve no doubt encountered it through Peter Warlock’s Capriol Suite. This is a collection of six dances, composed for piano duet in 1926, where Warlock takes melodies from Orchesographie and creates his own music from them. It’s since been arranged for many different ensembles, include strings, symphony orchestra and for recorders too.

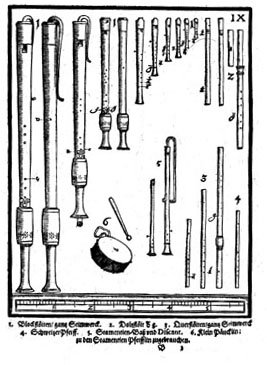
Orchesographie includes no fewer than 47 dance choreographies, including the dances I’ll talk about today. He includes history of the dances, advice about the behaviour of those dancing them, along with woodcut images and tablature illustrating the steps. This invaluable treatise is still available today, both as a facsimile of the original (you can download it free from IMSLP here) and in an English translation, published by Dover Books.

Let’s now take a look at the Renaissance dances you may meet while playing the recorder. We’ll explore the background to each one (including alternatives names used for many of them), the style of dance and some examples of each.

Pavan

Pavane, pavana, padovana, paduana

One of the Pavans from Orchesographie - click to see enlarged.

The Pavan (along with the galliard) is perhaps the most familiar dance from this period. The earliest known example was published in Joan Ambrosio Dalza’s Intabolatura de lauto libro quarto in Venice in 1508. It gradually grew in popularity, peaking in the mid 1500s and dying out by the end of the 16th century. However, its popularity as a form of music continued well beyond that and there are many examples from more recent composers such as Fauré and Ravel.

The Pavan is a stately dance in two time, for many couples in a procession, slowly circling the ballroom. The choreography is quite simple, with backward and forward steps and moments where the couples rise on the balls of their feet and sway from side to side. The steps can also be ornamented if the dancers desire. Arbeau describes it as an opportunity for the them to display their elegant attire.

Dances often come in pairs (this is equally true in the Baroque period) and the Pavan is often followed by a Galliard (of which we will learn more shortly) as you can see in the following example.

Holborne Pavan & Galliard

Perhaps the most famous Pavan is John Dowland’s Lachrimae, his signature tune, to which he later added lyrics to create the lute song Flow My Tears.

Dowland Lachrimae Antiquae - Jordi Savall & Hespèrion XXI

Galliard

Gaillarde, gagliarda

Often paired with a pavan, the Galliard is a livelier dance, in three time, popular throughout 16th century Europe. It’s a carefully choreographed dances, where the dancer hops on one foot while making a flick of the other foot, as if to kick someone, interspersed with bigger leaps.

While the dance is quick, the music must be slow enough to accommodate all these detailed steps. Arbeau notes that the music will need to be slower when playing for big men as they will take longer to execute these steps than a man of smaller stature. He also urges dancers to control their movements so the ladies don’t show their knees and to take care not to kick one’s partner!

The Galliard was reportedly one of Queen Elizabeth I’s preferred dances, despite its vigorous nature. In 1589, when the Queen was already in her mid-fifties, John Stanhope of the Privy Chamber reported,

“the Queen is so well as I assure you, six or seven galliards in a morning, besides music and singing, is her ordinary exercise.”

Byrd Galliard a 6 - Fretwork

Almain

Almand, allemande, allemanda, alman

The Almain is a livelier dance than the Pavan but not wildly energetic. The music has two beats per bar and Arbeau describes the dancers as processing hand in hand in pairs, walking for three steps and then balancing on one foot. Later versions of the dance used three springing steps and a hop. Over time the Renaissance Almain developed into the Baroque Allemande which we’ll look at in part two of this series.

Ferrabosco Almain in D - English Cornett & Sackbut Ensemble

Coranto

Courante, corrente, corant

The Coranto is a brisk dance whose title derives from the Italian word to run. Arbeau describes it as having fast running and jumping steps, although curiously he also describes it as being played in two time, when most music of this title has three beats per bar! The dance continued its evolution, becoming the Courante during the Baroque period.

Byrd Coranto - Buffalo Guitar Quartet

Towards the end of his 1599 collection of dances Antony Holborne includes a number of Corantos. Perhaps the most famous is The Fairie Round, which perpetually shifts between 3/2 and 6/4 rhythms, although these changes often happen independently in different parts. This offers many challenges for the musicians playing it and I can’t help wondering whether he intended the music to be used with dancers. The myriad of cross rhythms would certainly make their life exciting too!

Holborne The Fairie Round - David Munrow & Early Music Consort of London

La Volta

Volta, volte

An example of Arbeau’s choreography notation for La Volta - click to see enlarged

This was reportedly another of Queen Elizabeth I’s favourite dances, although it was considered to be somewhat vulgar by many. Like the Galliard, it has a brisk three beats in each bar and is danced with hopping and jumping steps. But the risqué element comes when the man lifts his partner, holding her corset, while turning - tame compared to today’s ballroom dances but no doubt quite shocking for the 16th century!

Byrd La Volta - The Academy of Ancient Music

Branle

Bransle, brawl

The Branle is another brisk dance, this time in two. The name comes from the French word branler which means ‘to sway or shake’ and this is reflected in the sideways, swaying steps. As with so many historic dances, the Branle was danced differently depending on where you were in Europe. It has many varieties, including a number named after different regions of France. Arbeau gives choreography for no fewer than eight different varieties of Branle!

Branle de Bourgogne - Bavarian Brass

As an additional example this one rather tickled me - the Washerwoman’s Branle, performed in a launderette!

Basse dance

The Basse dance, or low dance, was a popular court dance in the 15th and 16th centuries. Its name reflects its choreography, where the dancers’ feet glide gracefully, barely leaving the floor. Like the Galliard, it’s in triple time, but often played at a more measured pace. Another similarity to the Galliard comes with its use of hemiolas, where two bars of three are grouped to feel like three bars of two.

If you’re familiar with Warlock’s Capriol Suite you’ll recognise this example which features the melody used in Orchesographie.

Arbeau Basse Dance - Praetorius Ensemble & Christopher Ball

Basse Danza Lauro

That completes our quickstep through the dances of the Renaissance period. It’s been fascinating to explore the different dance types and to see their choreography and if that has whetted your appetite to learn more there are endless videos available on YouTube. I’ll return to this topic again in a few weeks time with a look at dances from the Baroque period. Here we’ll encounter some familiar dance names, albeit with choreography which has evolved along with the music.

Metronome - friend or foe?

Many musicians have a love/hate relationship with their metronome. It’s intended to help keep our rhythms on the straight and narrow, but used in the wrong way it can feel more like a musical tyrant. This week’s blog is intended to help you make friends with your metronome. Used in the right way, a metronome can be an immensely powerful tool, and I hope my words will help you understand some practical ways you can make yours work for you rather than against you.

What does a metronome do?

For those who’ve never used a metronome, it’s simply a tool that plays a regular pulse at a variety of speeds. These speeds are measured in beats per minute, just like your heart rate. There are many different ways you can use one, but we’ll get into that shortly.

The wind up mechanical metronome was patented in 1815 by Johann Maelzel under the title “Instrument/Machine for the Improvement of all Musical Performance, called Metronome”. This wasn’t the first such device, but earlier ones depended on the use of a pendulum and made no sound.

For those who are interested in the etymology of words, the term metronome comes from the Greek words metron (measure) and nomos (regulating/law). With this derivation it’s no wonder we sometimes feel our musical time keeping device is laying down the law to us!

Which type of metronome should I buy?

If you’ve never owned a metronome, the choice can be bewildering.

Traditional metronomes tend to be pyramid shaped, with a small weight mounted on a metal bar which swings from side to side, like an inverted clock pendulum. These models are clockwork so you do need to remember to wind them up from time to time or your chosen speed will gradually slow down. They can be beautiful (in my youth I had a hankering for a classic mahogany one but never had enough spare cash) and produce a satisfyingly analogue clunk, but aren’t very portable.

If you’re after a more compact option, there are plenty to choose from. For many years I used a small battery powered metronome which had a good, loud tick. The tempo on models like this is controlled with a dial or buttons and many have a light which flashes too.

When I was a student I had the ultimate in portable metronomes - a flat, credit card sized electronic model. This was super convenient to carry to college, but its high pitched ‘peep’ was less helpful when practising the smaller recorders or harpsichord as its sound got lost among the notes!

These days most of us carry around a smartphone and there are many metronome apps available to download for iOS or Android phones. Some are free, others cost a few pounds, but this option offers the ultimate in portability in today’s world. If, like me, you always have your phone in your pocket you can quickly check a speed whenever and wherever you need to. I use a free app called MetroTimer, which makes a satisfying noise, like two woodblocks being knocked together.

There are a couple of other options I’d not come across until recently. The first is a metronome within an earpiece. Korg make such a model and there are others too. If you find it hard to focus on the sound of the beat while playing, this may be helpful, although you could also use earphones with one of the smartphone apps. One of my pupils introduced me to this type of metronome and told me she finds it harder to ignore than the traditional type!

Finally, while researching this post I learnt about yet another variety - a metronome watch which vibrates on your wrist to remind you of the pulse. The model I came across was made by Soundbrenner (costing around £100 at the time of writing) but there are other makes available too. This may be a little too niche for many, but it’s worth considering if you really want to feel the pulse.

Metronomes with benefits

You may find the simple ticking of a metronome is all you need, but some models come with added tools. The most common is the ability to have a different pitch sounding on the first beat of the bar. If you find you wander from the beat while playing you may find this helpful, although of course it might just be an added distraction! The app I use offers this option but I can honestly say I’ve never used it because I prefer the ability to repeat patterns without having to wait for the first beat of the bar.

Tempo guidance

Many metronomes have markings which bring the beats per minute together with the Italian terms you’ll often find in music. For instance, Allegro may be shown as somewhere between 120 and 160. You may find these helpful, but in my experience they often bear little reality to the music I find myself playing! The correct metronome mark is very context dependent, so don’t be afraid to ignore these indications if they don’t fit with the music you’re practising. It’s also worth mentioning that the definition of some expression marks (Vivace, for instance) has changed over the centuries, so the tempo your metronome suggests today may not be appropriate for a piece composed in the 17th century.

Tune up!

Some metronomes also play a tuning note - usually A=440. This may be handy occasionally, but the important thing is that you play in tune with the other members of your ensemble, even if the overall result doesn’t strictly adhere to an absolute pitch. I would also argue that if you really want to check the pitch of your playing across the whole range of the recorder, it might be worth purchasing a tuner (or a tuner app for your smartphone) rather than relying on just one note.

Want a metronome with a difference?

Another discovery while researching this is the plethora of metronome options on YouTube! If you want to make your practice time more funky, just search for ‘metronome drum beat’ and the speed you desire and you’ll probably find an entire drum kit at your disposal, like this one. Maybe not the ideal accompaniment for Bach, but for those who are ‘mature’ enough (I count myself in this category) it may remind you of the 1980s Hooked on Classics craze for “improving” famous pieces of classical music with a funky drum beat!

Why use a metronome?

There are two main reasons why you might use a metronome - to improve the regularity and evenness of your rhythm or to increase your speed. I’ll look at these two uses in more detail shortly, but first I have some useful exercises to help you make friends with your metronome.

Let’s make friends with our metronome

I’ve taught many pupils over the years who struggled with their metronome. Used in the wrong way, it can feel as if your metronome is a sentient being, actively working against you. Go on, admit it - you’ve cursed yours at one time or another, haven’t you?!

This often happens because we’re either not truly listening, or we’re being overambitious with our speed. If you struggle to play in time with your metronome try these simple exercises to help you really zone in on the pulse.

  1. Set your metronome to a comfortable speed, say 100 crotchet beats per minute. Listen to the beat for a few seconds - and I mean really listen. Don’t get distracted by the other sounds around you, focus on the pulse and count along silently with the beat in your head: 1-2-3-4.

  2. Now quietly tap along with the pulse - use your fingers on the table, or against the palm of your other hand. Make it a small movement rather than big hand claps. Close your eyes and listen to your tapping against the metronome. Are they truly together?

  3. While we’re going back to basics - make sure you never tap your foot while playing with a metronome. Your foot is part of your body and if there’s any internal conflict you’ll always revert back to following your foot rather than the metronome!

  4. Once you’re happy your tapping and metronome are matching neatly, grab a recorder and play repeated notes against the beat. Don’t try and play scales or melodies at this stage, but instead keep it really simple. Close your eyes and really focus on coordinating the movement of your tongue with the pulse from the metronome. Once your beat has settled, then double the speed of your tongue strokes to play quavers instead of crotchets. Are they absolutely even, or do they vary in speed? Don’t be afraid to experiment - play smoothly and staccato and try out different rhythm patterns against the beat.

Hopefully by now you’re really in tune with the pulse from your metronome. Now adjust the beats per minute, faster and slower and repeat the exercise. With each different tempo, take a few seconds to really listen to the beat before you start tapping or playing. So often I hear students jump in feet first without stopping to internalise the speed of the pulse first. If you haven’t done this you’re unlikely to play in time, at least for the first few beats!

As you vary the speed of this exercise, try to be aware of where your weaknesses are. At first glance, playing quickly may seem difficult, but slow music can be just as challenging. Tapping and playing against a slow beat takes great control, especially if the pulse is slower than your resting heart rate. Keeping a pulse of 70 beats per minute going consistently is one thing, but when the rate slows into the 40s and 50s the beats can seem an awfully long way apart. Try this same exercise at 40 beats per minute and you’ll quickly see what I mean!

Moving on from the basics

Having made friends with your metronome, the next step is to use it to benefit the music you’re practising. As I explained earlier, there are two main reasons why you might use one so let’s look at those.

Improving your sense of rhythm

One reason to play with a metronome is to improve your rhythmic control. Our sense of rhythm can be a very flexible thing, easily thrown by concentration (or lack of), or imperfections in our technique. Here are my top tips for improving the consistency of your rhythm and making the notes more even…

You don’t need to play entire pieces

I almost never play complete movements with the metronome. Quite apart from the danger of turning oneself into an automaton, there’s every chance things will unravel at some point, creating frustration. Instead, pick out a short passage to work on. Once you’ve made some progress then move on to the next section.

Really listen to your playing

Decide on the section you want to work on and play it with the metronome. Remember to listen to the pulse for a few seconds before you begin to really internalise the tempo. When you play, focus on your rhythms and ask yourself if the notes are genuinely even.

Try double time

If you find your fingers are rushing or slowing relative to the pulse it may be you’re struggling to judge the distance between the beats. If the pulse is slow your brain may find it easier to play evenly against a faster beat. Double the beats per minute and try playing against that instead. For instance, if you were practising at crotchet = 56, double the speed to 112 and play your quaver beats against that. This reduces the distance between the beats and can make it easier to play evenly.

For instance, this is a passage from Vivaldi’s Concerto in A minor, RV108, which I recently performed in a concert. When practising, this passage threw up a few problems which I solved by using my metronome. To tidy up my fingering I used exactly the process I’ve just described, starting with a quaver speed of 96 to make sure my fingering was completely even before speeding the music up again.

Don’t pick an overambitious speed

If you struggle to play in time with the metronome you may be stretching your technical abilities beyond breaking point. Attempting a speed which is too fast simply means you have more multitasking to do - feeling the pulse, getting around the fingerings, tonguing neatly, remembering the correct rhythms and more. As we’ve discussed before, humans are pretty bad at multitasking, so taking the speed down a few notches may well give you a better chance of success. We’ll look at how a metronome can help you increase your speed later. 

Tackle unevenness with different rhythms and articulations

Do your fingers get out of control during what should be even runs of notes? If so, try changing the rhythm from even notes to dotted rhythms. Then play the rhythms with the note values reversed, so the short note comes before the dotted note, like Scotch snaps. When you can master this, playing the simple, even notes will seem easier by comparison.

For instance, the example below shows the first bar of the same piece of Vivaldi, first with dotted rhythms, and then repeated with Scotch snaps:

Sometimes slurring can bring challenges too. Your fingers are more likely to become uneven and uncontrolled when you slur. For some reason, using the tongue to articulate notes often helps control the finger movements. Slurring removes most of the tongue strokes and often induces unevenness in the fingers. Quite why this is I’m not sure, but I’ve seen it in so many pupils’ playing that it can’t be a coincidence!

When faced with long slurs, try breaking them down into smaller groups, slurring in twos, threes and fours. As you regain control, gradually lengthen the slurs until you can play long strings of notes evenly without the aid of the tongue. Focus on the quality of your finger movements, making them small and quick - use no more energy than you need to. If you can play every phrase even and slurred, tonguing the notes should be easy by comparison!

Here’s that same Vivaldi bar, this time with different slurring patterns. I used exactly these patterns while practising and once I could play all of these neatly and evenly, playing them all slurred or all tongued felt easy by comparison!

Close your eyes

In problem areas, memorise short bursts of notes and practise them with the metronome with your eyes closed. Removing visual distractions helps you listen more carefully and notice unevenness sooner.

Break the music down

Never be afraid to dismantle the music, choosing short passages to work on with the metronome - perhaps even just a few beats - and repeat them lots of times. Playing long passages demands sustained concentration and by the end you may have forgotten mistakes made earlier. As you put these smaller fragments back together again, vary where you start playing from. If you can confidently pick up a piece of music from any note in any bar you’ll have much more confidence and security.

The need for speed

Increasing speed is another important reason to practise with a metronome. When faced with a new piece of music it’s so tempting to push the speed on too much too soon. Doing this increases the risk of introducing new mistakes and then reinforcing them. We all know how hard it is to break bad habits - so why not avoid creating them in the first place?

Identify problem areas

With any piece of music many of the notes will become fluent quite quickly, leaving you with a handful of stubborn problem areas. These are the areas you need to focus on with your metronome. I tend to remind myself of their locations with a pencil mark in the margin, but you may have your own favourite annotations.

Find your starting speed

It’s easy to be obsessed with the finishing line and reaching your ultimate speed, but for now put that out of your mind. Instead, play the short passage which needs work and find a speed where you can comfortably and reliably play it correctly well. It doesn’t matter if this initial tempo is stupidly slow - your aim at this point is for consistent accuracy.

Below you’ll see a photo of another passage from the same Vivaldi Concerto. Here you get a glimpse into my process, with a mark in the margin to show I need to work on this bit, plus a metronome speed of crotchet = 76. This is at least 20 notches slower than the final performance tempo, but this was my starting point - a speed where I could consistently and accurately play the passage without errors.

Try subdividing the beat

If your chosen speed results in a really slow pulse, don’t be afraid to subdivide the beat into smaller units. For instance, if you’ve ended up at crotchet = 50, the beats can feel an awfully long way apart. So why not double the speed of your metronome beat and play at quaver = 100. This doesn’t change the speed you’ll be playing at but makes it easier to slot your notes in against the metronome.

Preparing to speed up

Play the passage with the metronome at this speed a few times and really focus on your technique. Check your fingers are finding the notes cleanly and without any feeling of being on the edge of your comfort zone. Is your tongue working smoothly and evenly to articulate the notes? You may be playing the music at half speed or slower, but that doesn’t matter - you’ll soon begin to increase your velocity.

Fool your fingers into going faster

Before you go any further, take a moment to listen to the speed of your metronome. Let’s assume you’ve set it to quaver = 100. Really feel the pulse as the metronome ticks. Now increase the speed a tiny amount. On some metronomes the next step may be 104, so select that and listen again. It doesn’t really feel any faster, does it? Now play your chosen passage with this increased metronome speed. Is it still comfortable? The chances are you won’t really notice this tiny increase in speed but you’ve already taken the first step towards your final destination.

Play the passage a couple more times to reinforce the new speed and then notch your metronome up another step - say, quaver = 108. Continue this process, incrementally increasing your tempo. When you reach a speed where your fingers and/or tongue begin to falter, really focus on their quality of movement and try to identify which finger(s) is letting you down before you go any further.

Break things down even more

When your reach a tempo where your fingers move with less ease, don’t be afraid to break the music down. You could divide the passage into single beats and repeat each one several times before moving onto the next. If you do this, it’s also a good idea to continue to the first note of the next beat at least some of the time. This way you have a connection between the beats and that’ll be helpful when you begin to slot things together again.

It may be the transition between just two notes that’s tripping you up, so practise moving between them, ensuring your finger movements are clean and precise. I call this process of breaking the music down into smaller units forensic practising. It may only take a couple of minutes to tidy up a short passage but it’s worth being thorough. By doing this you’re reinforcing the finger patterns you’ve learnt, building strong muscle memory.

Don’t accidentally gain speed

Always play your repetitions of these smaller units against the metronome beat. If you turn it off you’ll almost certainly speed up in frustration and undo some of your good work.

Putting the jigsaw back together again

When the individual beats are neat and precise again, begin to join these small musical units together once again - half a bar at first, then whole bars and so forth. Don’t be ruled by barlines either - you could begin mid-bar and play across to the centre of the next bar. This is all about removing barriers in the music so everything joins up fluently. If all’s well you can then begin to gradually increase the speed of your metronome again.

Build up speed in short bursts

The process I’ve described may seem complicated and tedious, but you may be surprised how effective it is. Don’t try to reach your ultimate speed in one sitting though. It’s better to do a short burst each day (or even a couple of times a day if you can), creating staging posts on the way to your final destination. At the end of each session, pencil the speed you’ve reached into the margin of your music. This gives you a sense of achievement and will remind you where you need to start next time. As you have success with this technique it’ll encourage you to keep going.

When you come back to the music next time you may find things have slipped a little. Say you’d reached quaver = 126 in one sitting, you might need to backtrack to 120 briefly and work up from there. This ‘three steps forward, two back’ approach is entirely normal so don’t be disheartened.

Changing down a gear

At some point there will come a point where your metronome’s quaver pulse begins to feel very fast. This is the stage where you need to halve the number of your metronome mark and revert back to crotchet beats. Before continuing further, do play the music through with your new, slower crotchet pulse to get used to the change. From there you can continue the same process and eventually you’ll reach your final speed.

Putting things back together again

Every so often I would recommend slotting the passage you’ve been practising back into context, playing through the whole movement, warts and all. Don’t fret if you still make mistakes. Doing this allows you to take stock and see just how far you’ve come.

After a few practice sessions you’ll arrive at your final tempo with the knowledge that your fingerwork (and articulation) is really secure. This process may take a little while but, in my experience, it’s a surefire way to conquer a difficult passage and increase the speed in a reliable way.

Quick tips to hone your metronome technique

Finally, a few handy hints which didn’t quite find their way in elsewhere…

Don’t overuse your metronome

While the metronome is a valuable tool, there are times when you should put it aside. Don’t get into the habit of always playing with the metronome, or you risk sounding like an automaton. The pulse is a framework on which we hang the notes we play. The major beats need to be in time, but for music to really sound fluid and expressive there needs to be some flexibility. A metronome doesn’t allow you to stretch individual notes or take a little extra time to breathe between phrases. Don’t be afraid to put the metronome to one side from time to time and focus on putting your humanity back into the music.

You’re human - sometimes you’ll disagree with your metronome!

Your relationship to tempo naturally varies day to day. If you’re tired you may play at a more leisurely pace, but after a really good night’s sleep you may be pumped up and raring to go faster. This is entirely natural, so don’t be afraid to increase or decrease your metronome speed a little if the two of you disagree sometimes!

Don’t run before you can walk

Never be afraid to reduce the speed of your metronome if you need to. By hammering away at a speed which is beyond the ability of your tongue and fingers you’ll just reinforce your mistakes and make it harder to unlearn them. Going back to a slower tempo helps you regain control and make your playing more secure in the long run - slowing down isn’t an admission of failure!

Close your eyes

When we remove one of our senses the others work harder to compensate. Playing short passages (or longer ones if you’ve memorised the music) with your eyes closed will focus your ears on your playing even more. If you’re playing with the metronome, listen critically with your eyes shut and ask yourself if you’re really in time with it. You may be surprised what you notice!

* * *

Do you think you’ve found a way to be friends with your metronome now? Yes, you’ll no doubt curse it from time to time, but a metronome can be such a powerful tool when used in the right way. If you have your own tips for metronome practice please do leave them in the comments below - I’d love to hear your strategies too and we can all learn from each other.

Bass is beautiful

How deep do your recorder foundations go? Do you enjoy playing the full range of recorders, or are your eyes still focused on the highest instruments?

Today we’re going to take a look at the bass branch of the recorder family tree. If you already play a bass instrument I hope I’ll have some useful tips to help you improve your skills. And for those who are yet to dip a toe in these deeper waters perhaps I’ll open your eyes to the possibilities and joys of larger recorders.

It’s amazing how the recorder world has expanded its horizons, just within my adult life. When I first attended the Recorder Summer School as a teenage student there were a good number of bass players, but the larger sizes of instrument were still rare - maybe just one or two each of great and contrabass. I was so excited by the sound of these larger recorders in the massed playing sessions I even sent my parents a postcard to tell them all about it!

These days it’s not unusual for us to welcome between 10 and 15 great basses and a similar number of contrabasses to massed playing sessions at the Recorder Summer School. We often have a handful of instruments which are larger still, bringing even greater depth to the music. These wonderfully sonorous instruments offset the potential shrillness of highest recorders, creating a range of tones which would have been unimaginable fifty years ago.

My first foray into the bass recorder world

I first discovered the bass recorder early in my teens. Rummaging in the school music cupboard, I found an old bass recorder with thick orange varnish, a good layer of dust and home to at least one spider. Evidently no one had touched it in years, so I asked my teacher if I could try. She said yes, so I took it home, evicted the spider, washed out the crook and gave it a go. I’d recently begun playing the piano and could read bass clef, so I set about figuring out where the notes lay on the recorder.

We’d been working on James Carey’s Mock Baroque with the school recorder ensemble and presence of the bass meant we now had a full consort and no need for the optional piano part. That made me indispensable and I was hooked!

Several years later, at my first Recorder Summer School I included a PS on that postcard I sent my parents, nonchalantly adding, “Please can I borrow some money to buy a bass recorder”! Cheeky, perhaps, but I did already have the money saved up at home and I couldn’t wait to play an instrument of my own with those rich low notes - far better than the wheezy old school bass!

Why play the bass recorder?

Put simply, bass really is beautiful!

Renaissance bass recorders, where you blow directly into the windway.

The mellow tone of the bass (sometimes also called a basset) is just gorgeous and you’ll find a warm welcome in any recorder ensemble. There’s a great deal of pleasure to be derived from playing the bass line in consort music - you’re helping create the foundations upon which the rest of the music is built. In some music (especially Baroque) you form the musical powerhouse, while in polyphonic music (for example Renaissance consorts) you play an equal role in the interplay between voices. Yes, there are some pieces where the basses draw the short straw and have less to do, but in general composers today understand the need to write interesting parts for everyone - not just the high voices.

If you really want to enjoy the gorgeous tones of the lower recorders it’s becoming more popular to offer eight foot ensemble options at many courses and playing days. This is a group where the highest line is the tenor recorder, with multiple parts extending down to the contrabass and sometimes beyond. Playing the bass recorder in one of these allows you to enjoy these mellow tones from the centre of the ensemble, really feeling you’re part of the action. I conduct such a recorder orchestra (you can learn more about METRO here) and I regularly welcome between 40 and 50 people to our playing days to luxuriate in the lush tones.

The benefits of playing the bass recorder

All recorder players understand the need to work on breath control and tone production. The bass can be a tremendously useful tool here because it makes greater demands on our lungs. Filling the larger bore of the bass with air requires you to breathe more deeply and efficiently to produce a good tone. Even if you can’t manage to play long phrases, the very act of practising the bass recorder will improve the way you use your natural lung capacity, meaning you’ll be able to play further on one breath on the smaller instruments too.

Another benefit of playing the bass is the way it opens up your awareness of other elements of recorder technique. Let’s think about some of these bass specific tips, but remember they’ll help your technique on smaller recorders too.

Top tips for bass players

Breathing and tone

Finding enough air is a challenge for everyone who plays larger recorders. You might assume you need to blow really hard to fill the larger bore of the bass, but you’d be wrong. Yes, a bass will swallow up all the air you can throw at it, but if you overdo things and blow too harshly your tone will be coarse and forced. The principles are just the same as any other size of recorder - make a full, rounded tone, but don’t force things. If breath control and tone production is something you know you need help with, do take a look at the blog I wrote about just this here

You will run out of air!

Unless you’re superhuman you’ll find your lungs run dry more often when playing the bass recorder. Just how soon this happens will depend on your natural lung capacity, and you may need to accept that full four bar phrases just aren’t possible, at least at first.

To combat this, get creative and find more places to breathe. In passages with lots of detached notes you’ll probably be able to take small top ups between notes. In more sustained music it may be necessary to make room to breathe. Use this as an opportunity to reconsider your phrasing.

Whatever you do, you mustn’t compromise your tone or tuning. So often I hear long notes which sag towards the end, losing tone quality and pitch. This simply isn’t acceptable or pleasant to hear. Instead, find somewhere extra to breathe so you can support your tone to the end of every phrase.

If you find yourself playing in an ensemble with several players per part there are other strategies at your disposal. I often ask ensembles to, “make it sound like you’re playing a four bar phrase”. Note the language I used there. I’m not asking them to play four bars without a breath, but instead to give the aural impression they’re doing that. Bass playing is often a team effort. Have a chat with your neighbour and agree where each of you will breathe. Perhaps one could breathe in at the most musical places, while the other takes breaths in really daft, unmusical spots. This way there will be at least one person playing at all times and you will give the impression that you’re collectively playing the full phrase! Talk to any contrabass player and you’ll find they do this all the time.

No chiffing please!

If there’s one thing that’ll spoil an elegant melodic bass line it’s an ugly ‘chiffing’ sound at the start of each note. Bigger sizes of recorder are particularly prone to this - a by-product of the instrument’s larger windway. If you’re not sure what I’m talking about, grab your bass recorder and play some notes with really strong tonguing. Close your eyes and really listen. Do you hear a percussive sound at the beginning of each note? That’s what I mean by chiffing.

As with the breath, it’s easy to assume a bigger recorder needs stronger tonguing. In reality, because bass recorders are so prone to this effect, you need the opposite - gentle tonguing. For high notes this may seem counterintuitive, but as long as your breath is moving quickly enough, even the highest notes don’t need anything more than a gentle tongue stroke.

Yes, there may be pieces where this percussive effect is required or even desirable, but in 99% of cases you should aim to avoid chiffing.

Fragile low notes

All recorders suffer from the same challenges at their extremities. Bass recorder music rarely ventures up to extreme high notes (that’s not really the point of the instrument), but being able to play the lowest notes cleanly and clearly is vital. Gentle tonguing and slower moving air will mostly help you achieve this, but stretching your fingers to the lowest notes can be challenging, especially if you have smaller hands. I wrote about the challenges of extreme low and high notes recently so do check this out if you haven’t already seen it.

Before you begin playing, take a moment to check your bottom joint is in exactly the right position. Scan through the music and see whether you need bottom F or F sharp most often. If you only need one of those notes, why not position the footjoint so you can reach that key most comfortably. If you play one of the square Paetzold bass (or larger) recorders do check your instrument’s joints are firmly pushed together too. Even a minor leak at one of the joints can stop your bass notes singing clearly.

Flexible fingering

As you venture lower in the recorder family you’ll find a need to be more flexible with your fingerings. Standard fingerings, which work so well on higher instruments, may not always be in tune on a bass. For instance, low E flat is often out of tune when played with the standard 0/1-34 fingering. If your instrument came with a fingering chart, check what it recommends for E flat. Many suggest using finger 5 rather than the usual finger 4 on the right hand. It may take a while to adjust to this change but you’ll find it easier to play in tune with others.

Spend some time playing slow scales on your instrument and get to know its foibles. A tuning meter can be useful here as a way of checking which notes are particularly sharp or flat. If you have a smartphone there are several free tuning meter apps available to download. Don’t be afraid to refer to your instrument’s fingering chart to check what the manufacturer recommends. To get used to these different fingerings, find easy tunes and scales you can play to build up the muscle memory.

A handy alternative fingering for top C sharp.

One notable quirk of many bass recorders is a difficulty with top C sharp. Most plastic bass recorders simply won’t play the note with the standard fingering unless you’re able to slur up or down to it. You won’t need this particular note very often, but it pays to be ready when you do. Happily, there’s an alternative fingering which works really well on almost all basses - see the diagram here:

As you can see from the chart, this fingering is a little out of the ordinary, but you’ll be grateful you learnt it when you suddenly need a top C sharp!

A word on clefs

The most common clef for bass recorder music is the bass clef. That seems logical, doesn’t it? Well, yes and no! Bass recorder music is notated with the lowest note appearing just beneath the bottom line of the stave. Look closer though and you’ll see a small 8 just above the clef - that means every note sounds an octave higher than written.

If you were to rewrite the same music at sounding pitch in the treble clef you’d find the lowest note is just five notes beneath Middle C! Compared to a cello, bassoon or tuba (all of which can play notes at least an octave an a half lower still) that barely counts as a bass instrument at all.

Of course notating the music in bass clef makes it easy to read because you’ll encounter relatively few leger lines. For this reason alone it’s worth getting really comfortable with the bass clef. Try to read the notes for what they are rather than relating the pitches back to the treble clef and doing a form of transposition. Not only does it make reading quicker but it also means you’ll always know the name of the note you’re playing at any time.

Although the bass clef is most commonly used for the bass recorder, it can be useful to practise playing it from the treble clef too. Occasionally you’ll find bass recorder parts printed in treble clef and being able to play treble recorder music on the bass can be handy if, for instance, you spontaneously want to try a piece of Renaissance music out an octave lower with an ensemble. This sort of mental flexibility is always worth cultivating, much as it sometimes pays to be able to read treble recorder music an octave higher.

Advice for new bass players

If you fancy having a go on the bass recorder but haven’t yet taken the plunge, the prospect can seem a little daunting. To help you take those first steps here are my thoughts on how you might get started.

Which type of bass recorder?

Unlike the small recorders you probably began with, basses come in many different forms. This can be bewildering at first, so let’s take a look at the options.

Straight or Knick?

Praetorius’s illustration from Syntagma Musicum which shows bass recorders (3rd and 4th on the top row) plus their larger and smaller siblings.

Look at images of historic instruments and they all tend to be straight. Renaissance basses are generally designed so the player blows directly into the instrument. This offers the benefit of a clear, full tone because your breath has a clear path through the windway to the labium. The disadvantage of this design is you do need quite long arms to reach the fingerholes!

One solution to the long arm problem is to add a crook - a curved pipe which leads to the headjoint, shortening the distance from mouthpiece to fingerholes. Larger renaissance recorders (great basses and lower) used this design and most 18th century bass recorders did too. While this may be more comfortable, the narrowness of the crook can make the sound a little less direct. You may also need to anticipate the beginning of notes as the breath has further to travel before it reaches the labium. That said, some players prefer an instrument with a crook so it’s very much a matter of personal preference.

A new innovation over the last thirty years has been the knick bass. This is fundamentally a straight recorder with an obtuse angle built into the headjoint. You retain the ability to blow directly into the windway, but this bend brings the main body of the recorder closer to you, so pretty well anyone can play one. In recent years this type of bass recorder has become by far the most popular, simply because it offers a great balance between tone and comfort.


Basses by IKEA?

Herbert Paetzold with his family of square recorders.

Another twentieth century innovation has been the development of square basses. They’re quite a common sight on recorder courses these days, but I’ve often heard non-recorder players ask if they were purchased from IKEA! These instruments were first developed by Herbert Paetzold in the 1950s on the principle that if you could have a square wooden organ pipe that sounded like a recorder, surely it must be possible to make a square, wooden recorder. Initially they were made from marine plywood (water resistant and cheaper than exotic hardwoods) but today you can also buy 3D printed models made from a material called Resona. The first of these square recorders were the larger great and contrabass variety, but more recently they’ve become available in bass (and even tenor) sizes too.

Plastic or wood?

This choice may come down to budget. Relatively inexpensive plastic knick instruments are a great way to begin exploring the world of the bass recorder. These begin at around the £200 mark for a Triebert (the Early Music Shop’s own brand model) and increase to £325 for a Yamaha.

If you want to venture into wood prices begin at around £1000 so you’ll probably need to be sure you’re going to stick with the bass before taking the plunge. And that brings me onto another consideration…

How many keys?

For larger recorders to be played comfortably keywork is needed. At its simplest this may just be a single key for the right hand little finger so you can reach bottom F. However, for many people having just one key may makes some of the holes impossible to cover. Most knick basses have at least one extra key for both the left and right hands - a feature which makes the bass playable for pretty well anyone. Many basses require a smaller hand stretch than a tenor recorder.

For this reason alone, a plastic knick instrument is a great place to start your bass recorder career. They produce a good tone, offer a comfortable playing position and are relatively inexpensive compared to wooden or square models. If you already play in an ensemble ask around and you may even find someone who’s upgraded to a wooden instrument and might be willing to loan you their plastic bass to try.

When it comes to wooden recorders, I really would advise you to find a shop where you can try some  instruments. This way you can learn which shape recorders suit you best and understand which ones have keywork that fits your hand shape. If you don’t live near a recorder shop (and sadly few of us do) it’s worth looking out for recorder courses and summer schools as many of them host pop up recorder shops on site.

Getting comfortable

If you’ve figured out which type of bass recorder fits you best you must also consider how to support your instrument. All basses tend to come with a sling supplied and this may be all you require. It hooks onto the back of the instrument so you can suspend the recorder from your body. Most people hang the sling around their neck, but don’t overlook the option of lengthening the strap to stretch it from one shoulder across your body instead. This reduces the strain on your neck and may be more comfortable for long periods of playing.

Another option I sometimes use when sitting is to cross my legs at the ankle. I then rest the bell of my recorder between the bottom of my calves. This takes any strain away from the neck and means the body of the recorder is vertical between my knees. Of course this won’t work if you’re wearing a short or fitted skirt, but it’s a handy solution when wearing trousers!

A bass recorder spike

If you like this idea but don’t find resting the bass on your ankles comfortable, a third solution is to use a spike. These attach to the bottom of your instrument and you adjust the length of the spike to rest it on the floor. The ground takes all the weight and you can play your bass vertically between your knees or to one side if you prefer. Some wooden basses now come supplied with a screw-in spike (the Kung Superio model, for instance) but you can also buy after-market ones which attach via an adhesive Velcro ring stuck to the bottom of your recorder. This is perhaps the most comfortable way to play, but if you like to stand up the spike is unlikely to be long enough unless you rest the end of it on a stool or chair.

Bring your bass to you

My final piece of advice with regards to playing position is as important as your choice of support.

I often see players stretching their chin forward to reach their bass recorder. This puts a tremendous strain on your neck and can cause injury over long periods. The key thing here is to find a playing position which is comfortable and then bring the bass to you. This may be as simple as shortening your sling or moving the bottom of your spike a little closer to your body. Don’t forget too that most knick basses have two points of adjustment in the headjoint. A slight tweak to one or both of them may mean you don’t need to strain or bend your neck awkwardly. The best solution is to sit in front of a mirror and see how your posture looks. If it looks uncomfortable it’ll almost certainly feel uncomfortable after a long playing session!

Don’t forget to consider the height of your seat too. This is particularly pertinent with great and contrabass recorders as they’re often less adjustable than a regular bass. Look around any recorder orchestra and you’ll see many of the contra players bring their own seats or stools to ensure they’re at just the right playing height. Sometimes a couple of chairs can be stacked together to increase your height, but take care as this can also make you less stable.

Books to get your started

Over the years many books devoted to the bass recorder have been published, with several designed for complete beginners. These are the ones I’ve found useful to help my pupils get started over the years….

Denis Bloodworth - The Bass Recorder Handbook (Novello)

The original bass recorder tutor book and still handy today. The music increases in difficulty quite quickly, but it’s packed with helpful information about fingerings so I think it’s still a great addition to any bass player’s library.

Rosemary McGillivray - Mrs McGillivray’s Welcome (Hawthorns Music TT01)

A bass recorder tutor book with a Scottish flavour. Rosemary brought together lots of lovely tunes to get anyone started on the bass recorder. The book begins with a fingering chart, an introduction to the bass clef and some helpful advice, followed by lots of carefully graded tunes to play, many of which share Rosemary’s Scottish heritage. Each time a new fingering is introduced there are plenty of melodies to help you put it into practice. Very well thought out and my top recommendation for new bass players.

Hugh Gorton - Recorder Practice Books 16-23: Grades 1 to 8 (Recorder Music Direct)

A series of graded books, each packed with tunes to get you practising the bass recorder. Each book contains hundreds of melodies, providing you with almost endless repertoire to build your confidence and technique.

Playing the bass with others

One of the main reasons to play the bass recorder is to make music with others as part of an ensemble or orchestra. Playing any new size of recorder with others for the first time can be daunting, but don’t let that put you off. A good place to begin is in the some of the easier ensemble sessions at recorder courses, or at a massed playing session at larger recorder events. You’ll find safety in numbers, meaning you can play as much or as little of the music as you’re able to at first without fear of standing out.

Of course, if you don’t want the pressure of playing with others face to face straight away, don’t forget there are lots of easier consort pieces and video recordings over on my own Consort Downloads page. These give you the chance to make mistakes without feeling you’re holding anyone else up and you can repeat them as often as you wish! Look for anything that’s marked *Easier* as your starting point.

Heading deeper still…

Let’s assume you’ve taken the plunge with the bass recorder and you’re enjoying its rich tones and the chance to be part of the music’s engine room. What’s next?

How about one of the bigger basses?

It’s worth taking a moment to talk about the naming practices for big basses as this isn’t always consistent. You’ll notice among my consorts I use the terms great bass and contrabass. These are the names most commonly used here in Britain, but there are other systems too. As the range of bigger basses gradually expands the British system runs out of options. Below the contrabass we have the subcontrabass (sounding an octave below the great bass) - all logical so far. But when you reach the next member of the family (an octave below the contrabass) you run out of names - should that be the sub-subcontra?

In Europe and the US a different system has been adopted where the contrabass and lower have names which usually relate their size to the smaller types of bass. This is entirely logical, but not consistently used in Britain yet. The clearest way of explaining this is perhaps illustrated by the table below, showing the two naming systems, along with an explanation of their relative pitch. The two largest sizes are still relatively unusual, but they’re gradually increasing in popularity.

The keys of a Paetzold conrabass recorder

Many recorder ensembles now have a great and/or a contrabass player among their number. If you’ve heard them in action you’ll understand how powerful these instruments can be. Of course I don’t mean powerful in terms of loudness, as they’re relatively quiet compared to a tuba! However, even a single great or contra can add to the impact a recorder consort simply through its depth. The best comparison I can make is sound difference when an organ has a pedals - doubling the bass line alone somehow seems to increase the gravitas of the regular bass notes. This is why I was so blown away by that massed playing session at the tender age of 16, even when there were just a couple of contras among a massed group of 140 recorders.

Now buying a great bass or contrabass is an expensive business, so it’s not something you’ll necessarily want to leap into straight away. However, players of big basses are often generous souls and are sometimes willing to allow others to try their instruments if they see the potential to win more folk over to the deep end of the orchestra.

Even if you can’t try an instrument out for yourself, grab every opportunity to sit near the big basses when playing in an ensemble. Just playing the bass among the big boys will give you an aural glimpse of their wonderfully lush tones. I should warn you though, once you’ve dipped your toe into the deep, warm big-bass waters you’ll be spoilt for life - it’s addictive! I personally love playing the great bass in larger ensembles because you’re part of the bass team, but can also find yourself in the enveloped in the midst of the harmonies.

* * *

After our exploration of all things bass, have I tempted you to dip your toe into these deeper waters? Or maybe I’ve made you think about ways you could improve your bass playing?

Either way, I hope you’ve found some useful advice among my words and I’ll leave you with the Berlin Recorder Orchestra playing the Albinoni Adagio almost entirely on low instruments. Turn up the volume and luxuriate for eight minutes in the sound from their forest of big basses!

A brief history of tempo

We all wrestle with the concept of tempo from time to time. Does a given piece of music need to be fast or slow? Are we capturing the speed and character the composer had in mind when they wrote it? Where did the markings we see on our music come from and how should be interpret them?

What is tempo?

Fundamentally, tempo is the speed at which music is played. Every piece of music has an internal pulse holding it together – think of it like your own heartbeat. Sometimes a slow pulse is best (your resting heart rate while you’re sitting still, relaxing); at other times a quick pulse creates a sense of drive and excitement (just as your heart rate rises when you become more active).

So how do we know which speed of pulse is appropriate for any piece of music? Some composers are very explicit in their instructions, but often you need a little knowledge of musical history or be willing to do some detective work. Notation has changed a lot over the centuries, so an appropriate speed for the music of one period will be completely unsuited to repertoire from a different era.

Let’s take a look at how tempo has been notated through history and consider what this means for our own playing.

The Renaissance 

Introducing the Tactus

Without time signatures and barlines, the earliest forms of music used a different  type of pulse to that indicated by a modern conductor. The rhythmic focus in Renaissance music was called the tactus - a unit of time indicated by the raising and lowering of the hand (to help the musicians keep good ensemble) and music began with a mensuration sign. This indicated how the tactus would be split, be it into two or three subdivisions. This tactus may have generally been close to the resting heart rate (a speed of which all humans have an awareness) perhaps 60 - 70 beats per minute, but historic sources aren’t consistent on this subject. Each tactus indicated the main beat (often a semibreve) which would be divided into either two or three minims, depending on the mensuration sign.

This is why much renaissance music is written in minim beats. To our modern eyes it often looks slower than other music, but to Renaissance eyes the type of notation helped indicate the tempo. As music became more complex the number of note values expanded to include smaller notes (our crotchets and quavers) to allow for faster music, but the tactus fundamentally remained the same. If you’re interested in learning more about the tactus and how it was used this video explains it very well:

So where does this leave us when we have to select a tempo for Renaissance music? The historic sources we can refer to are conflicting, so it often comes down to common sense and our own musicality. Here are some tips to help you:

Context

Look at the music and observe the types of note values it contains. Is it mostly semibreves and minims? If so, a semibreve pulse may be appropriate. On the other hand, if the music breaks down into smaller note values (crotchets and quavers) perhaps a minim pulse would be better. 

Some music editors (particularly in older editions) try to be ‘helpful’ by halving the note values, turning minims into crotchets and so forth. For musicians who aren’t used to feeling a minim pulse this may be helpful, but the downside is the entire piece looks faster. Where once you had quavers you now have semiquavers. To inexperienced musicians that can look scarily fast, causing then to choose a pulse which is too slow to compensate. I know many musicians find counting in minim beats tricky, but it’s a skill you should persevere with learning because it opens up a vast array of music to you. Of course, if you ever choose to play from facsimiles of Renaissance publications reading minim (or even semibreve) beats is a must.

Below we have the same Byrd Fantasia in two different editions, The first uses Byrd’s own note values, while the second halves the note values to try and make it easier to read. Of course, this process also makes the music look quicker!

Vocal music

Do consider the text in the music you’re playing. Is it a cheery madrigal which demands a lively approach? Or perhaps it’s a melancholic love song where a slower tactus might be more appropriate? If you don’t speak the language used in the lyrics, set aside some time to Google the composer and title of the piece and find out what it’s all about. 

Dance music

Here we have more clues to work with - the type of dance. A Pavan is a stately dance (although not necessarily very slow), while the Galliard is livelier, requiring the dancers to hop and leap in the air. I’m planning a future blog post looking at the different dance styles, but in the meantime the internet can once again be your friend. Most dances have a page on Wikipedia where you can learn more about the style and typical dance steps. This knowledge should inform your choice of tempo.

Switching between duple and triple time

Renaissance music often shifts between two and three time, but how do you know what to do with the tactus when this happens? 

Look at many modern editions of Renaissance repertoire and you’ll often see a marking suggesting the length of the triple time bars should be equal to half a bar of the preceding time signature. This often creates a satisfying mathematical connection between the sections. If you refer back to treatises from the period you’ll find some recommend exactly this approach, while others advise making the whole bar length equal in both duple and triple time. One would hope there might be a clear notational way of showing which is correct in any given piece, but you’d be disappointed! This is one area where there was no notational consistency so my advice would be to try both and see which feels right to you. Sometimes the pragmatic approach is best…

Gabrieli Canzon Primi Toni, with an editorial suggestion regarding tempo relations at bar 44.

The Baroque

By the time we reach the Baroque period composers began adopting time signatures and bar lines consistently (there is inevitably an overlap with both being used around 1600), so the notation looks more familiar to our twenty first century eyes.

Use of language

Another new development was the use of language to indicate the tempo. Italian is the most common choice, but composers of other nationalities sometimes used their own language. It’s worth remembering that the Italian musical terms we’re familiar with today didn’t necessarily have the same meaning in the 17th and 18th centuries. For instance, in Romantic music Vivace is often interpreted as very fast, but for Baroque music it tends to imply a lively tempo - somewhere between quick and slow. 

The concept of a unifying pulse hadn’t entirely disappeared and the term Tempo ordinario (often used by Handel) may well relate to a human’s normal walking pace. Other words used to describe tempo are intended to direct us to a speed relative to this consistent tactus, be it faster or slower.

Italian is not the only way…

Italian may have been the most common language for tempo indications, but it wasn’t universal. Many French composers used their own language and some of their terms are more expressive than their Italian counterparts - for instance Doucement (sweetly) and Gracieusement (graciously - as in the example by Hotteterre below).

Henry Purcell used Italian words in many of his works, but sometimes he used straightforward English words like Brisk and Slow, leaving the musician to figure out just how fast or slow that should be. In many of his Fantasias you’ll also find the word Drag written in places where he wishes to slow the tempo.

The influence of a time signature

Another way Baroque composers indicated the speed of a piece was through their choice of time signature. Explore the recorder sonatas of Telemann, for instance, and you’ll see that slow music is more likely to have a time signature where the lower number is a 2 - indicating a slow minim pulse. In contrast, music with a time signature where the lower number is 8 is generally played quickly. He uses both in his Recorder Sonata in C in exactly this way.

Telemann Sonata in C, 3rd movement

Telemann Sonata in C, 4th movement

Dance music

Dance forms were just as popular as during the Renaissance, although the dance types inevitably evolved over time. Here again, a little knowledge about the dance types should inform your understanding of the appropriate tempo, but bear in mind the composer may not have actually expected anyone to actually dance to the music if it appears as part of a sonata or concerto.

I saw a practical example of this many years ago at a competitive music festival where one of the set pieces was a Sonata in A minor by Schickhardt. The second movement is marked Allemanda and most of the competitors chose to play it at a swift tempo. This gave the music a breathless feel and many of the youngsters struggled with the semiquaver passagework. To illustrate a more appropriate tempo the adjudicator, Evelyn Nallen, got everyone on their feet and had us all dancing an Allemande together. The dance steps fall on the quavers beats so when we related this back to the Sonata, the music suddenly felt much more poised and playable. I think everyone there that day learnt an important lesson! 

Schickhardt Sonata in A minor, 2nd movement

Harmonic tempo

In Baroque music one of the most important musical elements is the bassline. So much of the period’s music is led by the harmony, so if you only look at your own part you risk missing out on some crucial musical clues.  

Take this Telemann Recorder Sonata, for instance, whose Cantabile marking suggests a singing style more than a tempo. Many players, when reading just the solo line, will select a very slow tempo, feeling a quaver beat, to make the faster notes easier. Now check the bassline and what do you notice? The majority of the harmonic movement falls in crotchet beats. Feeling a quaver beat means each bass note is very slow and it becomes almost impossible to retain a sense of pulse and movement in the continuo line. Instead, choosing a slow crotchet pulse (perhaps 54 beats per minute) allows the bassline to flow more easily, while the faster moving recorder part can still sing without being manically busy. 

Telemann Sonata in C, 1st movement

This is just one example, but you’d be wise to consider all the musical elements before selecting your tempo. Harmonic tempo is a tool composers use in different ways to influence our understanding of the music. As we learnt when we explored the subject of hemiolas, these were often used as a means of speeding up the rate of harmonic change to flag up the ends of phrases. If you missed it, you’ll find that blog post here.

The Classical and Romantic

Beyond the Baroque, the recorder lost popularity and was largely ignored as a musical instrument until the early years of the 20th century. However, it’s worth taking a look at music of this period as it directly influences tempo markings in today’s repertoire.

Beethoven Symphony No.9

Perhaps the biggest development was the invention of the metronome by Johann Maelzel in 1815. This allowed composers complete clarity in their speed markings. One of the earliest adopters as Ludwig van Beethoven, whose first use of a metronome speed came in 1815 in his Cantata Calm Sea and Prosperous Voyage, Op.112. Beethoven’s fast tempi have inspired much debate over the years as to whether a disagreement between him and Maelzel resulted in the metronome’s inventor providing him with a faulty one. However, we also know from Beethoven’s own correspondence that he regularly had his metronome calibrated so it’s like he really did intend his fast speeds. 

If you’re intending to play a piece which has a metronome mark I would treat that as something to aim for, but don’t be disheartened if the indicated speed is beyond you at first. If you have to opt for a more cautious speed initially and work up to it that’s absolutely fine. A musical performance which gets close to the composer’s metronome speed is always preferable to a scrappy, panic stricken interpretation which adheres slavishly to the marked tempo! 

One trap I often see students falling into is when they look at the tempo markings which appear on many metronomes. For instance, yours might suggest that a marking of Allegro should be played somewhere between 120 and 168 beats per minute. Do remember the correct speed can vary enormously and the best pulse will depend on the type of rhythms and the notation. In my experience I’ve almost always found the markings on my metronome to be distinctly unhelpful and bearing no relation to the music I’m attempting to play, so I generally ignore them and follow my musical instincts instead! 

Expressive use of language

Of course a metronome mark is only one part of the equation when it comes to showing a composer’s musical intentions. Speed is one thing, but as Romantic music became ever more expressive it was often necessary to give further information. Composers often augment their tempo words with additional terms to add a greater sense of expression. One of my favourites is Brahm’s instruction in his second Clarinet Sonata which marks the first movement as Allegro amabile - lively and friendly!

Brahms Clarinet Sonata Op.120 No.2

Some composers take these additional markings to extremes. In his 9th Symphony Gustav Mahler marks the second movement as Im Tempo eines gemächlichen Ländlers, etwas täppisch und sehr derb. If your German is as minimal as mine and you’re wondering what on earth that means, he intended it to be played as a slowish folkdance (like a Ländler), with some awkwardness and much vulgarity! 

Tempo today

That brings us to music from the 20th and 21st centuries where, one could argue, we have the best of all worlds. With metronome marks and the ability to translate any language easily with modern technology, composers can typeset their music with ultimate clarity. 

Paired with all the other possible expression marks (dynamics, phrasing, articulation etc) it’s easy to wonder how much autonomy we actually have as performers when composers specify so much detail. Should we ever deviate from those markings in the process of creating our own performance? Don’t forget we still have control over many aspects of our music making, including how flexible we are with the tempo - those little nuances of rubato which are unique to each of us. And some composers are still remarkably flexible about their creations. One composer I’ve worked with many times is very practical with her music and is often open to tweaks which might lead to a more fluid performance. 

A composer’s prerogative to change their mind

Of course, composers can sometimes change their minds about what they’ve written. One example of this can be found in Rachmaninov’s Piano Concerto No.2. As well as being a composer, Rachmaninov was a superb performer and conductor and recorded this piece twice with Leopold Stokowski and the Philadelphia Orchestra in 1924 and 1929. In his own performances you’ll find subtle changes to the tempi, notably accelerandi, which aren’t notated in the score. He also chose to shape the second musical theme in a way which isn’t shown in the score.

You could argue these are spontaneous and unimportant changes, especially as there was no way for recordings to be edited at the time. However, Rachmaninov also worked on the piece with Willem Mengelberg and the Concertgebouw Orchestra over a decade earlier and the conductor’s impeccably annotated scores concur with these changes.

These recordings are a fascinating glimpse into the mind of Rachmaninov the composer and performer and at least show us that no piece of music can be a rigid and unchanging entity. If only we had the chance to time travel in the same way and find out how composer/performers of earlier periods interpreted their own music!

So where does this leave us when we have to make our own decisions about the music we play? Ultimately I think we have to be practical and pragmatic. Yes, we should observe any instructions left by the composer, and if there are none we must be willing to find out what was expected via historical sources and online resources. Sometimes though decisions have to be made which allow us to create a musical performance. 

There will be times when our own technical limitations stop us following a composer’s intentions to the letter. Does that mean we shouldn’t attempt to play that piece of music? I would argue absolutely not! The majority of musicians in the world are hobbyists, playing for their own enjoyment. Holding back from even trying a piece of music potentially deprives us of the opportunity to explore new music. Sometimes you need to have a go, even if that means playing the music slower or faster than the composer intended, knowing you’ll gain something from the experience, regardless of whether we’re ultimately capable of honing the notes to performance standard. Yes, do research the piece so you know what you should be doing, and then throw caution to the wind and enjoy the moment as a true amateur - someone who plays for the sheer love of music!

The Technique Zone - Exploring the extremes

The recorder isn’t what you’d call an extreme instrument. Playing one doesn’t require huge reserves of stamina like a concert pianist or the astonishing coordination between hands and feet demanded from an organist. But the recorder has its own challenges - it’s an instrument which requires control and delicacy. Orchestral wind instruments have been developed and adapted over the centuries, adding keys and making tweaks to improve them. In contrast, the recorders we play most of the time are based heavily upon instruments crafted 250 years ago.

The nature of the recorder brings limitations – a smaller range than many other wind instruments, and weaknesses in the extremes of this range. Our low notes can only be played gently, while the upper reaches of the recorder are best played with a fuller tone. Good composers will write music which works with these limitations, making the most of them, but it’s still up to us to ensure we can play with confidence throughout the range.

This edition of the Score Lines blog is designed to help you learn to love your recorder’s low and high notes and I have tips and advice to get you playing these ranges with confidence and consistency.

Are there notes which fill you with dread?

Maybe you fret about playing low notes cleanly? Or perhaps your jaw clenches with nervousness as a top F appears on your musical horizon? We’ve all experienced moments when we’ve mentally crossed our fingers (doing so physically would be problematic), taken a deep breath and said a silent prayer to the recorder playing gods that a given note will speak cleanly. Go on, admit it, you’re quietly nodding in agreement, aren’t you?!

My aim today is to equip you with the tools to play the extremes of your recorder’s range without mental or physical tension, so you can play any note with confidence and consistency. I can’t promise instant results, but if you persevere you’ll get there…

A bad workman blames his tools…

There is a degree of truth in this old saying, but it’s worth giving your recorder a quick MOT, nevertheless. With a little care, all recorders will play low notes with ease, but high ones can be another matter. The majority of instruments are capable of playing the highest notes cleanly, but if you persistently have problems they may be exacerbated by your recorder.

The usual culprit is the thumbhole – take a quick look at yours now. Is it perfectly round, with clean edges? If so, you’re good to go. On the other hand, if it’s distinctly mis-shapen, with evidence of wear and tear on one side it may be time to give it some TLC. Worn thumbholes usually come about as a result of overenthusiastic thumb technique – digging your nail into the hole in an attempt to produce clean high notes. Of course, if you’re not the instrument’s first owner that may not be down to you!

Fortunately there’s a solution to this problem - thumb bushing. A good recorder technician will be able to add a small ring of hard wearing material (these days it’s plastic, although historically ivory was often used) to the edge of the thumbhole to restore the clean, round opening. I would recommend this if your recorder’s thumbhole is looking ragged – you may find it solves some of the challenges. Of course, I would also recommend you consider modifying your technique so the same thing doesn’t happen again!

While you’ve got your recorder handy, also take a look at the labium, the opening on the front of the headjoint, just beneath the windway. Is the edge of the labium clean and straight? A labium edge with dips or nicks will affect your sound, often adding a husky quality. Many years ago a pupil of mine had trouble with top notes so we sought advice about her recorder. On close inspection the repairer noted the labium had a distinct dip (created by years of jabbing a finger in there while blowing out excess condensation) and this had an adverse result. Sadly this particular recorder was beyond repair but it did at least explain the dodgy top notes.

Now you’ve (hopefully) given your recorder a clean bill of health let’s dive in and do some extreme recorder playing!

How hot is your breath?

Before we tackle our recorders’ extremes, let’s have a think about the breath you use to play these notes. This is relevant to both high and low notes so it’s a good starting point.

Hold your hand in front of your mouth and breath out gently, noticing the sensation you feel on the skin of your hand. Is the air warm or cool? If you’re exhaling gently the air will be warm. This is because it takes time to travel through your windway, picking up warmth from the blood vessels it passes over. This is the sort of breath you need to use for low notes.

Now blow out over your hand again, this time moving the air quickly. You may find it helpful to purse your lips to focus the stream of air and help it increase in speed. What do you notice now? The air is cooler, isn’t it? Because it’s moving more quickly it has less opportunity to pick up heat from your body and it’s still cool when it leaves your mouth. This is the type of air you should use for high notes.

Thinking about warm and cold air can be useful when you begin exploring the extremes of your recorder, because using the wrong type of airstream will make it harder to play these notes. If you want to relate these temperatures to the way you use your diaphragm, warm air requires just a gentle level of support, while cool air demands a firmer squeeze of the stomach muscles to acquire the extra speed. If you need a refresher on diaphragm breathing for recorder playing take a look here.

Logically, low notes shouldn’t be difficult. All you have to do is cover the holes and blow, right? Yes, that’s true, but there’s more to it than that! It’s important to consider the ingredients needed to create a lovely low note on the recorder. There are three required to bake this particular cake…

  1. Fingers – this is the obvious one – if you don’t cover the holes fully the note won’t play.

  2. Breath – you need gentle (warm) air for low notes

  3. Articulation – tongue strokes need to be gentle

Diagnosing fragile low notes

If your lowest notes often split or refuse to speak cleanly you need to do some detective work to understand why. Let’s look at the three ingredients I mentioned just now…

Go gently…

Not completely sealing the fingerholes is a common problem, especially if you’re playing a larger size of recorder. Take a moment to make sure your bottom joint (assuming it’s adjustable – some descants and sopraninos have fixed footjoints) is in exactly the right position for your hands. I often have to make tiny adjustments to the position of the footjoint with my tenor and bass recorders. Without doing so the bottom notes become unreliable because I fail to seal the holes entirely. There’s no reason why you shouldn’t make a small pencil mark on the back of the middle and bottom joints to help you line them up accurately and get the position right every time.

Now play the lowest note on your recorder and see what happens? Perhaps that small adjustment made a difference. If not, try again but blow more gently – remember, you need to use warm air. If that made a difference, maybe you’ve been blowing too strongly. The lowest notes on most recorders are weaker than the rest, so they need to be treated gently.

Still no luck? Let’s try taking the third ingredient away and see if that resolves the problem…

Think about how you would clean a pair of glasses – trust me, this is relevant! I wouldn’t mind betting you bring them to your lips and breathe gently over them, creating a mist on the lenses which you them wipe away with a cloth. Am I right? I call this ‘hurring’. Now try your lowest note again but begin it by ‘hurring’ into the windway. By doing this you’re taking away the articulation – the breath comes straight from your lungs without interruption from the tongue. What’s more, the flow of air is warm and gentle.

If this approach successfully helps you produce clean low notes, now try reintroducing the tongue, articulating using a gentle ‘doo’ articulation. If you tongue too forcefully the fragile low notes will crack – don’t try too hard! Try moving the tip of your tongue a fraction farther back in your mouth, increasing the distance between it and your teeth and softening the articulation a little. I wrote about gentle articulation in relation to playing smoothly in this blog – you may find it a helpful refresher.

Relaxation is crucial

Hopefully these techniques will now have you playing low notes more easily. There’s one other element which is key for all recorder playing and that’s relaxation. If you’re tense your body works against itself, using energy which could be better employed for other things. This is particularly important when it comes to your fingers. Aim to keep them relaxed at all times, using just enough pressure to seal the holes and no more. Remember, if you’re pressing too hard you won’t be able to feel the vibration of the air column beneath your fingers – use this to guide you. I covered this in a recent blog about finger technique so do take a look here.

Scaling the heights

Now let’s consider the recorder’s highest notes. The pitch may be different but the principles are remarkably similar. Once again there are three ingredients to ‘bake’ successful high notes…

  1. Thumb position – for high notes just one of your digits is critical – the thumb

  2. Breath – for successful high notes you need a fast (cool) air flow

  3. Articulation – this should be moderate – there’s no need for strong tonguing

Finding your thumb’s Goldilocks zone

The exact technique used to open the thumbhole to create upper register notes is a much debated topic among recorder teachers. Some teach their students to ‘pinch’, inserting the thumbnail into the hole to open it cleanly. Others prefer ‘rolling’, where you use the flesh of the thumb and a smaller movement. I won’t go into this in detail here (there’s plenty of material there for a blog post of its own), but if the technique you use works well then why change it?

The critical element to consider for high notes is how much you open the thumbhole. You’re searching for the Goldilocks zone - not too open, not too closed but just right! Look at most recorder fingering charts and you’ll see a half-filled circle to depict an upper register note. This may work for the first few notes, but once you reach two fingers with a pinched thumb you’re destined for failure with a half open thumbhole. Instead, open the hole just a fraction and your chances of success are much greater. Some recorders are more sensitive than others, so it’s often a case of getting to know your instrument(s) well and learning their foibles.

Of course, it’s all very well knowing your thumb isn’t in the right position but how do you know whether the hole is too open or too closed? Fortunately there’s an easy way to find out! It’s tricky to explain in text, so take a look at this short video clip where I explain the technique, complete with sound effects…

Don’t forget the breath and tongue

For many people getting the right thumb position while pinching can solve their problems, but it’s worth considering the other ingredients too.

In contrast with the lowest notes, high ones need fast, cool air to make them play. I find it’s best to consider the speed of your breath, rather than simply thinking, “I must blow hard!” Try to avoid bracing yourself for high notes. So often I hear players take a deep breath immediately before the high note which concerns them, before launching themselves at it with all their might. If the note comes out at all it’s likely to be overblown and tense.

Instead, your strategy is best compared to riding a bicycle up a steep hill. If you stop halfway up (the musical equivalent of breathing and bracing before a high note) it’s hard to get your momentum going again and the hill feels even steeper. You’re better off pedalling like fury at the bottom and the momentum you build up carries you up and over the summit. The musical equivalent is to breathe earlier and use your stomach muscles and diaphragm to get the air flowing swiftly before you really need it. This flow of breath carries you through and beyond the high note (providing you get your thumb position right) which will sing much more easily.

As for articulation, don’t tongue explosively. Use a moderate ‘doo’ articulation and trust that the breath and correct thumb position will do most of the heavy lifting. Providing your air stream is quick enough even the highest notes don’t require strong tonguing.

The elusive fourth ingredient…

Assuming you’ve found the right combination of thumb position, breath and tonguing to play your high notes there’s one more ingredient which will help you – a combination of confidence and self belief! If you approach high notes with a glass half empty attitude, assuming it’ll all go horribly wrong, there’s a good chance it’ll become a self-fulfilling prophecy. Playing tentatively often results in underpowered, broken top notes.

Instead, go into those higher registers with a positive attitude and total conviction - you’re much more likely to find the right speed of breath and articulation. Your tone will be fuller, the high notes have a greater chance of sounding well and you’ll gain confidence from your success. If it does go wrong, at least you’ll have given it your best shot and, as I often tell my students, if you’re going to make a mistake, do it with style and panache!

If a high note does fail, try to analyse what you did wrong – was your thumb position wrong, or perhaps you didn’t use fast enough breath? Use this as a learning experience and don’t be afraid to make mistakes. You are human (a species not known for its perfection) and no one will ever come to physical harm from a split note!

Be persistent

My final piece of advice is to be persistent. Don’t get into a negative frame of mind and give up - that way you’ll never conquer your fears. Keep practising and those elusive notes at the extremes of our instruments will come to you. Here are a few quick tips which I offer to all my students, which are equally applicable whether you’re soaring through the upper register or plumbing the depths…

Relax! Tension is the enemy of all recorder players. Wiggle your shoulders to loosen the knots, take a deep breath and exhale with a big, soulful sigh. Allow your cheek and throat muscles to go soft and flabby so your breath can reach your recorder unimpeded. The only tension you need is in your diaphragm and stomach muscles!

Slow down and don’t try so hard. Human nature dictates that when we fail we tend to try harder and faster. This is almost always counterproductive, so instead stop, take a deep (relaxed) breath and begin again slowly.

Keep a recorder handy at all times. The best way to improve a skill is to practise it little and often. If that top F eludes you on the treble recorder, keep an instrument out at all times (a plastic one can be handy for this), preferably left in a room you use a lot. Every time you walk by, pick the recorder and play the note(s) which need practice for twenty or thirty seconds. Hopefully you’ll end up doing this multiple times every day and the frequent repetition will be so helpful. Sitting down for a long practice session can seem daunting, but these frequent small bursts are easy to fit in on your way to the kitchen or before you walk the dog. Trust me - little and often really does help!

These tips should give you the tools you need to improve your extreme notes on the recorder. Aside from the technical details, the most important things are confidence, a positive attitude and regular practice. Spend a few minutes every day making friends with your least favourite notes and they’ll become a strength rather than a weakness. Why not make a resolution to practise them for a few minutes every single day for a month and leave a comment below to share your progress? I’d love to hear how you’re getting on!